
How does Shopify Shipping operate?
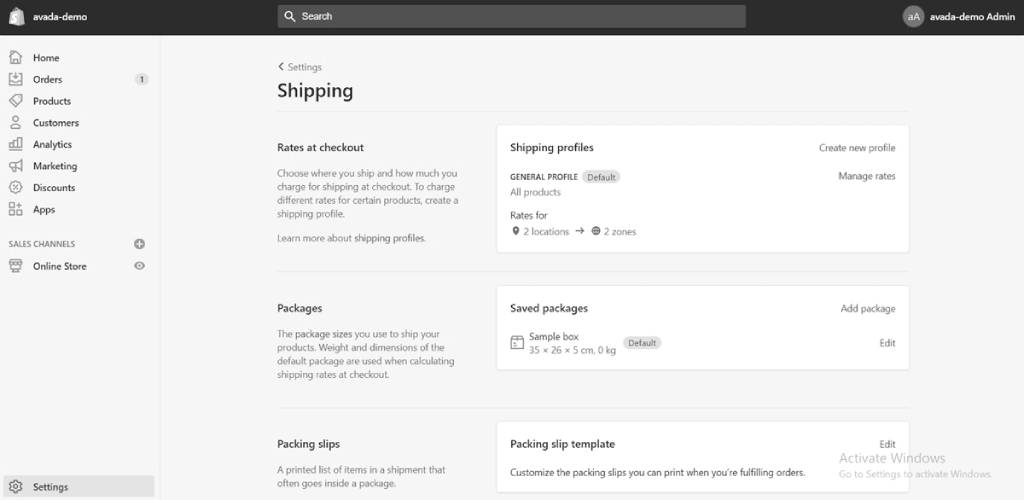
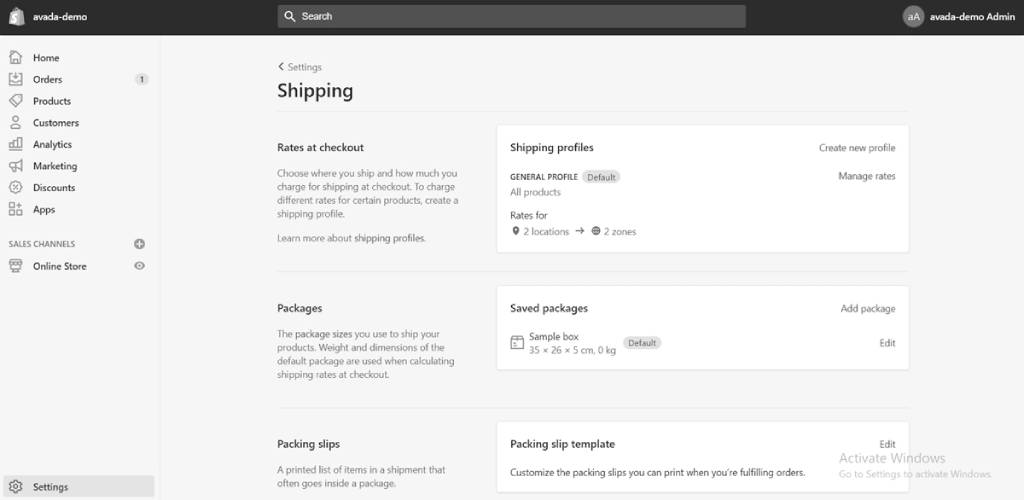
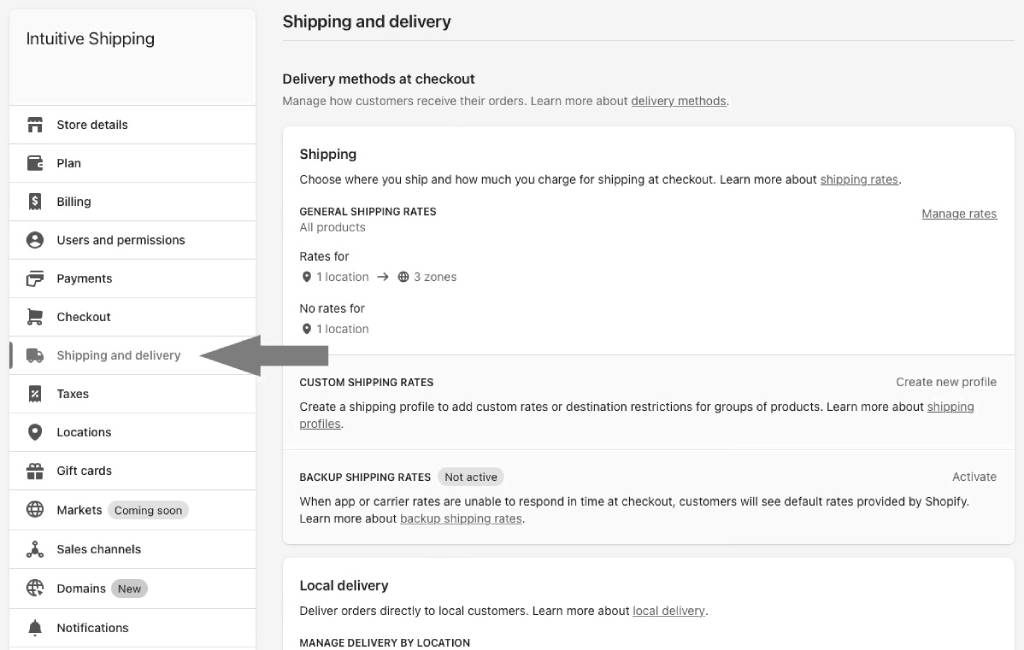
To access Shopify shipping options, navigate to your admin, click on Settings, and then select Shipping.
For optimal performance of Shopify Shipping on your online store, ensure you have entered dimensions and weights for all your items and variations.
Once carriers are configured and items are verified, you can start fulfilling orders. Keep in mind that while you have a range of shipping rates to choose from, customers will only see the flat or calculated rates you manually set up in your Shopify admin. To display real-time calculated rates, you’ll need to subscribe to the Advanced Shopify plan or purchase an add-on for $20 per month.
Key Features of Shopify Shipping
While Shopify Shipping may not offer the most extensive array of features, its shipping system fulfills the requirements of most small businesses. Here are some built-in features:
- Integrations With Major Carriers: Access real-time shipping rates from DHL, USPS, and UPS.
- Bulk Order Fulfillment: Set shipping rules for processing orders in bulk and purchase shipping labels directly in your Shopify admin.
- Bulk Label Printing: Print multiple labels for shipping at once, using either a thermal printer or a standard desktop printer.
- Shipping Insurance: Safeguard your parcels, ensuring compensation in case of mishaps.
- Flat Rate Or Calculated Shipping Options: Choose between setting flat shipping rates or estimating weight- and dimension-based rates.
- Customer Service Features: Provide real-time updates and tracking data for customers.
- International Features: Automatically recognize and generate customs details for international orders.
- Review & Update Shipping Selections: Analyze customer shipping preferences and, from your admin, upgrade customers to more affordable or faster services.
Reducing Shopify Shipping Rates
Lowering shipping costs can be a strategic move to attract customers and improve overall satisfaction. Here are steps to reduce Shopify shipping rates:
- Negotiate Carrier Rates: Reach out to your shipping carriers to negotiate better rates based on your shipping volume.
- Explore Shipping Discounts: Utilize discounted shipping services provided by Shopify or consider third-party apps that offer reduced rates.
- Optimize Packaging: Streamlining packaging can result in reduced shipping expenses. Select packaging that fits your items to minimize dimensional weight charges.
- Offer Flat Rate Shipping: Consider implementing flat-rate shipping options to simplify costs for customers and encourage higher order values.
- Free Shipping Threshold: Encourage larger orders by establishing a threshold for free shipping. Customers who reach a specified amount qualify for free shipping.
- Evaluate Shipping Zones: Review your shipping zones and adjust rates based on proximity. Consider offering special rates for local or high-volume areas.
- Subscription Services: Implement subscription services that offer discounted or free shipping for repeat customers.
- Use Regional Carriers: Explore regional or local carriers that may provide cost-effective shipping solutions.
By implementing these strategies, you can optimize your shipping strategy and potentially reduce overall shipping expenses for your Shopify store.
How to Change Shipping Price on Shopify
Discovering the intricacies of Shopify Shipping is essential before altering shipping rates. Here’s a step-by-step guide on how to change shipping prices on Shopify:
Step 1: Navigate to Shipping
Navigate to your Shopify admin, enter the Settings section, and select Shipping.
Step 2: Manage Rates
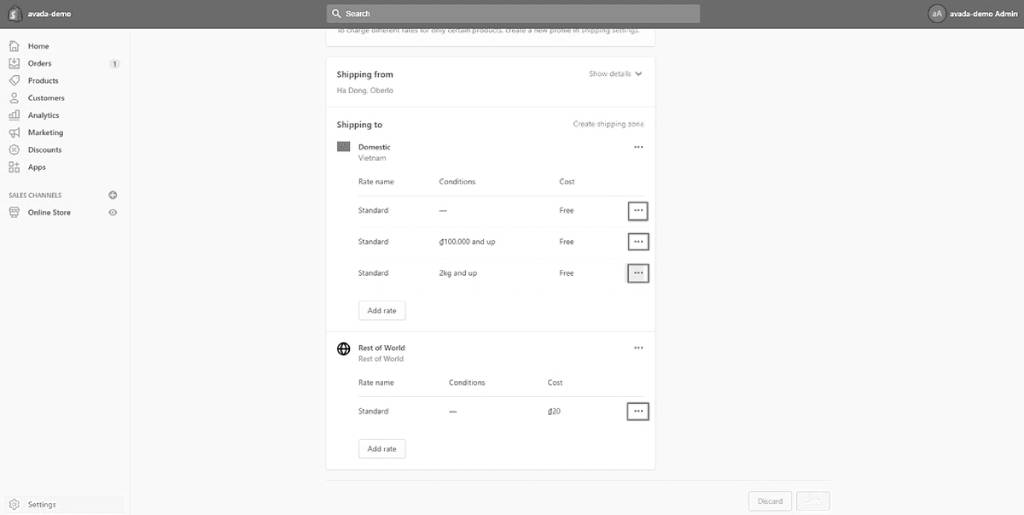
Hit on “Manage rates” beside the shipping profile where you wish to modify a rate.

Step 3: Open Options
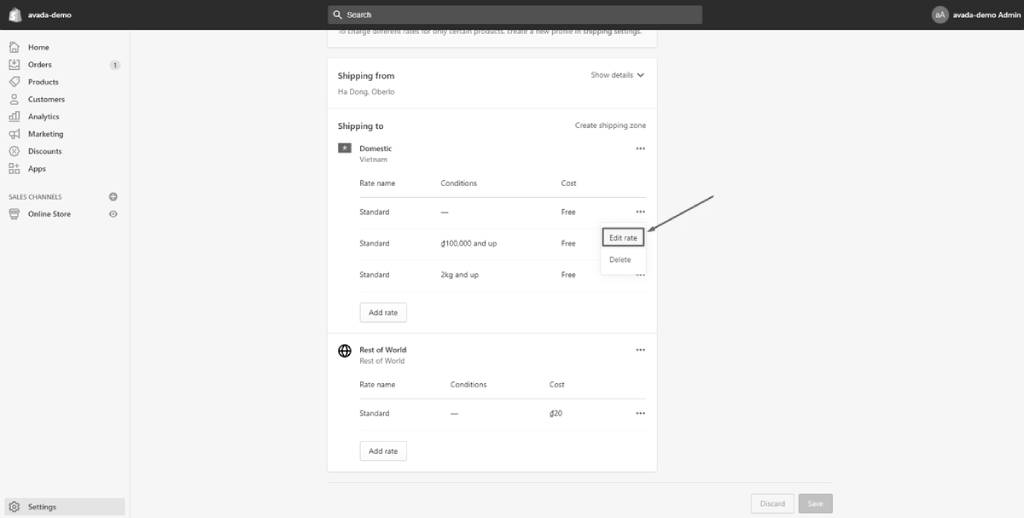
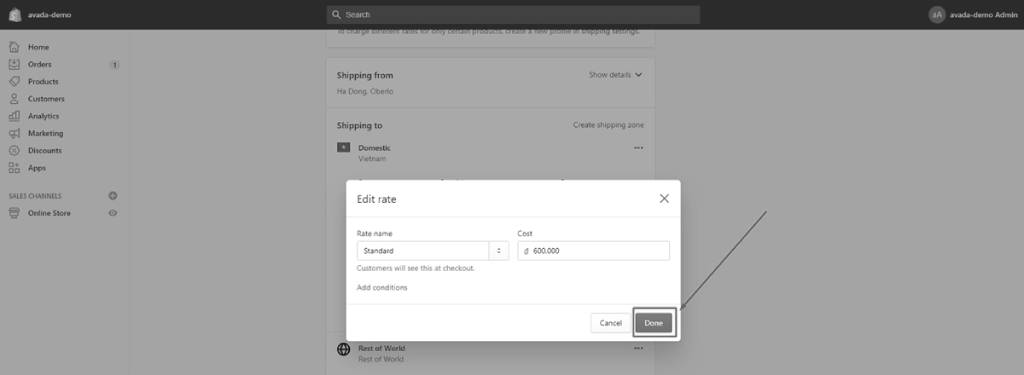
Next to the desired rate, click on the three dots (…)
Afterward, opt for “Edit rate” from the drop-down menu.
Step 4: Edit Rate Details
Adjust the rate details as needed and click “Done.”
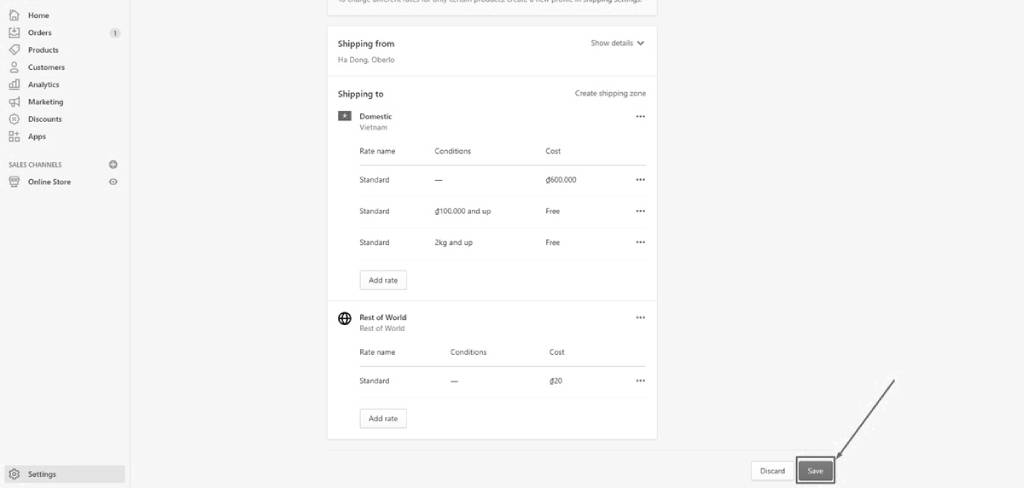
Step 5: Save Changes
Make sure to save your modifications by selecting “Save.”
Following these steps will enable you to efficiently change shipping prices on your Shopify store.
Create Shopify Shipping Profiles
Establishing Shopify shipping profiles is a fundamental step in configuring your shipping strategy. Whether you opt for product-based shipping profiles or manage general shipping rates, here’s a step-by-step guide to creating a custom shipping profile:
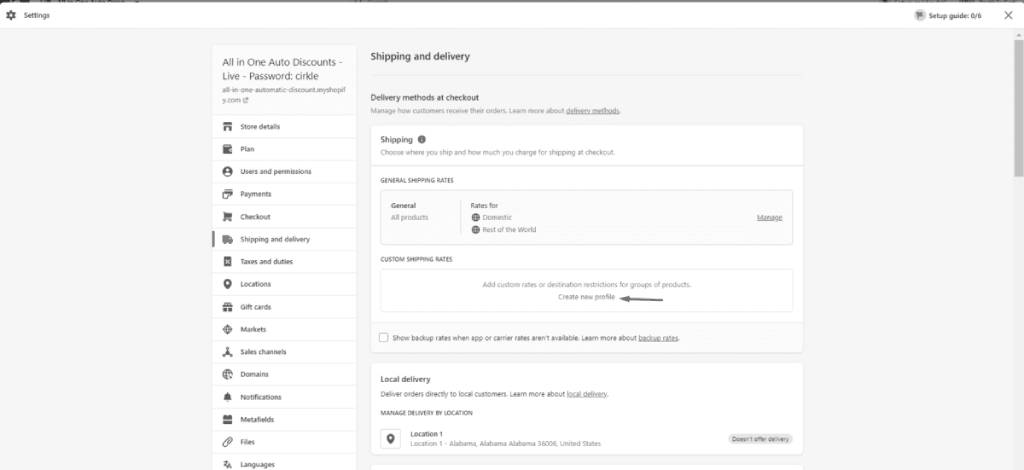
1. Reach Shopify Settings
Start by opening your Shopify store’s dashboard, then navigate to “Settings” and select “Shipping & Delivery” from the dropdown menu.
2. Create New Profile
To begin, select “Create New Profile” under “Custom Shipping Rates.”
3. Name and Add Products
In the “Products” section, provide a name for your profile and add relevant products using the search bar.
4. Adjust Locations
Make any necessary adjustments to the locations associated with your shipping profile.
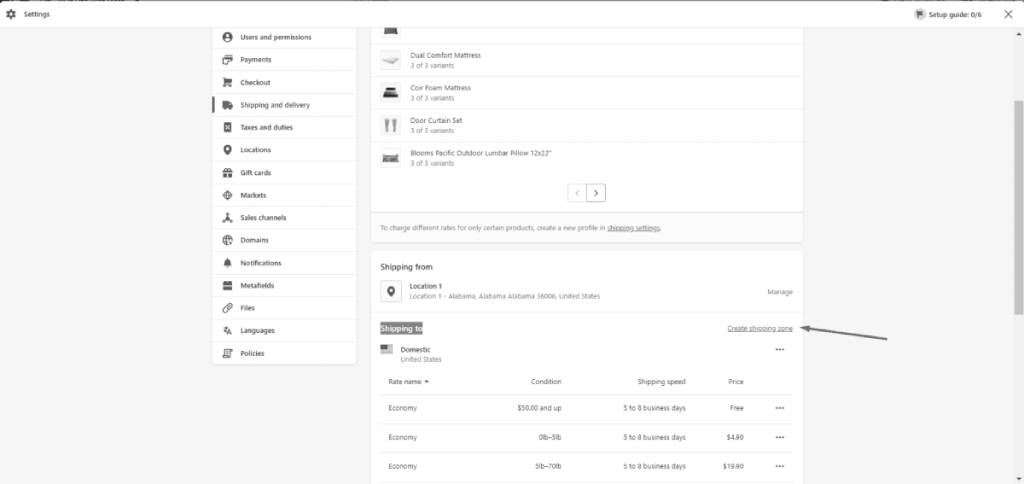
5. Create a Shipping Zone
For each shipping zone in your profile, click on “Create Shipping Zone” in the “Shipping To” box.
Name the shipping zone, select the countries or regions included, and click “Done” to complete the zone creation.
6. Add Shipping Rates
Hit “Add Rate” for each shipping zone to specify the shipping rates.
Choose the rate details to confirm Shopify shipping rates and click “Done.”
7. Save Changes
Save the file to apply the newly created shipping profile.
By following these steps, you can efficiently set up custom shipping profiles on Shopify, allowing you to tailor shipping rates based on product groups or manage general rates for a streamlined shipping strategy.
Set/Creating Shopify Shipping Zone
Creating shipping zones in Shopify is a crucial step to organizing and managing shipping rates effectively. Start by adhering to these guidelines to establish shipping zones:
Step 1: Access Shopify Settings
Proceed to your Shopify admin’s “Settings” section and choose “Shipping & Delivery” from the dropdown menu.
Step 2: Navigate to Shipping Profile
Press on “Manage Rates” in the shipping profile where you want to add the shipping zone.
Step 3: Create Shipping Zone
Next to the set of sites where you’ll add a shipping zone, click on “Create Shipping Zone.”
Step 4: Name Your Zone
Provide a name for your shipping zone.
Step 5: Select Countries or Regions
From the list, choose the countries or areas included in that zone. Tap “Done” to complete the zone creation.
Step 6: Set Pricing
Add any desired pricing for your specified zone.
Step 7: Save Changes
Press “Save” to apply the newly created shipping zone.
By following these steps, you can efficiently create Shopify shipping zones, allowing you to categorize regions with common tariffs and streamline shipping processes for better customer satisfaction.
How to Adjust Shipping Time on Shopify
If you’re looking to modify the shipping time on Shopify, follow these steps:
1. Disable Real-Time Rates
In Settings, go to Shipping.
Tap ‘Edit‘ for the relevant shipping zones.
Remove real-time rates by clicking the ‘x.’
Repeat for all zones.
2. Add Flat Rate
Set flat rates based on average shipping times from suppliers. Review the average shipping times from your suppliers, especially if you use AliExpress.
Consider price-based or weight-based tiers.
3. Specify Shipping Time
Include an estimated shipping time (8-15 days) in the customer-facing name.
These steps will help you effectively communicate shipping times to your customers on Shopify.
Saufter: Driving Business Efficiency with AI

Saufter.io is an all-in-one AI platform that helps businesses elevate customer engagement and enhance operational processes. Its robust features empower teams to act swiftly and strategically.
Key Features:
- Automated Campaigns: AI-driven campaigns are designed and customized to align with customer preferences and business goals.
- Weekly Campaign Suggestions: Weekly marketing recommendations ensure strategies stay relevant and impactful.
- Customer Issue Detection and Engagement: Tracks and resolves customer issues proactively with real-time notifications.
- Advanced Analytics and Real-Time Reporting: Provides valuable insights and alerts for quick, informed decision-making.
- AI Customer Journey Tracking: Monitors the entire customer journey to uncover patterns and engagement opportunities.
- SEO Automation: Offers AI-generated content suggestions to improve SEO performance and audience targeting.
- Marketing Automation: Replaces traditional marketing teams with AI-powered efficiency, driving productivity.


