Learn how to embed chat in the website effortlessly within just 10 minutes!
Live chat generates a 48% boost in revenue per chat hour and a 40% increase in conversion rates. With the ever-increasing demand for instant communication and customer support, integrating a chat feature onto your website has become essential.
Once embedded, you’ll instantly provide visitors with a direct line of communication, enhancing user engagement, improving customer support, and ultimately boosting conversion rates.
So let’s get started!
Embed Live Chat in Website: Benefits
- Approximately 85% of customers express satisfaction with live chat, enhancing the overall customer experience.
- According to a study, businesses utilizing live chat report a remarkable 305% return on investment.
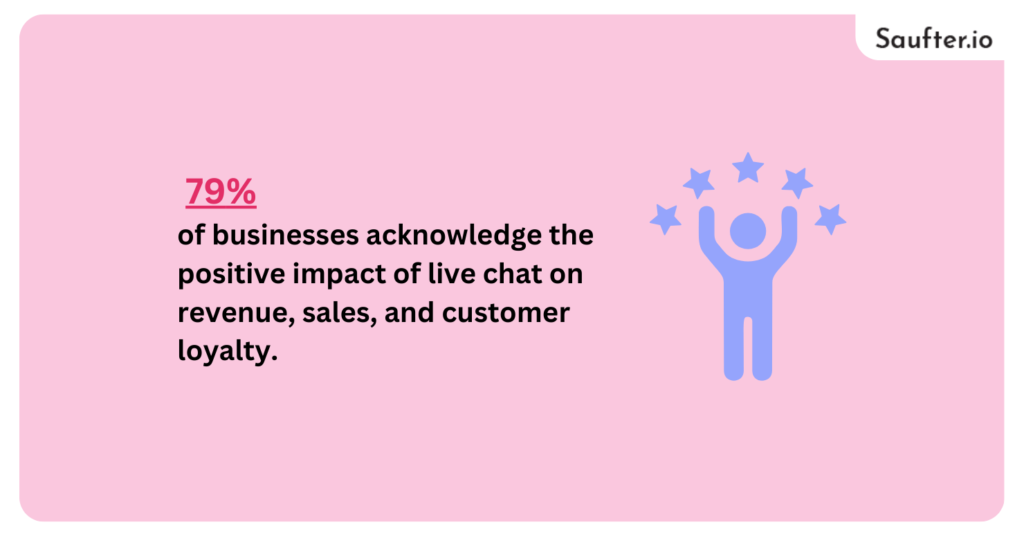
- About 79% of businesses acknowledge the positive impact of live chat on revenue, sales, and customer loyalty.
- Research indicates that around 41% of shoppers prefer real-time customer service via live chat over other support channels.
- 38% of people are more likely to complete their first purchase on live chat support websites.
- Approximately 73% of clients aged between 18 and 49 consider live chat as the most convenient communication method with businesses.
How to embed live chat in website?
For the best results with this guide, first, you can register for Saufter’s live chat here. This will allow you to follow the steps in real time.
Let’s dive into adding chat to your website in 11 simple steps.
Step 1: Choose the best live chat platform
The first step in adding chat to your website is finding the right platform that fits your requirements. Here’s what you should do to pick the right one for your business:
- List down the key features your business needs in a live chat.
- Search for providers that offer these features.
- Compare the prices of various platforms.
- Test out the platforms with a free trial.
- Decide which platform provides the most value for your money.
Step 2: Embed chat in website
You have two options to do this. First, you can insert a live chat code by copying and pasting the code into your website’s HTML source. Second, you can install a plugin or app through your content management system (CMS), such as WordPress or Shopify.
A. Using code to embed chat in website
Simply click ‘Show me the code‘ to access the JavaScript snippet. Copy this code to your clipboard, then navigate to your website’s backend and open the main HTML file (usually index.html).

Find the file containing the </body> tag and insert the JavaScript code just above this tag in your website’s source code. Save the changes to ensure they take effect.

If you wish to add the chat feature at a later time, you can find the code in your Settings under the Installation tab. Remember to save any modifications.
To confirm the chat widget’s presence on your website, visit the site and check for its visibility.
B. Embed chat in website using CMS
You can easily add chat to your website using the platform it’s built on. For example, if you’re using Shopify, you can add a free live chat with just a few clicks.
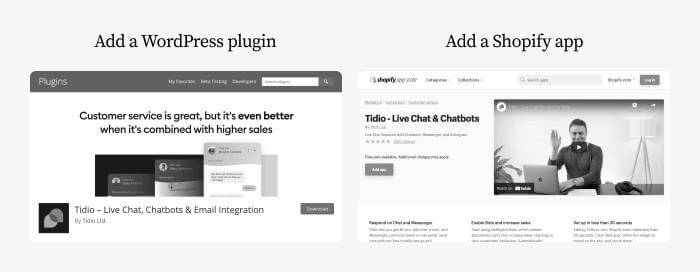
Here’s how:
- Go to your Shopify App store.
- Search for Tidio or use a general query like “live chat.”
- Choose the right app.
- Click “Add to site.”
Now you can log into your account and start setting up your web chat window.
Step 3: Personalize the chat widget
You can match the look of the live chat with the rest of your website by choosing colors and button designs. Also, you can tailor the welcome message to match how your brand speaks.
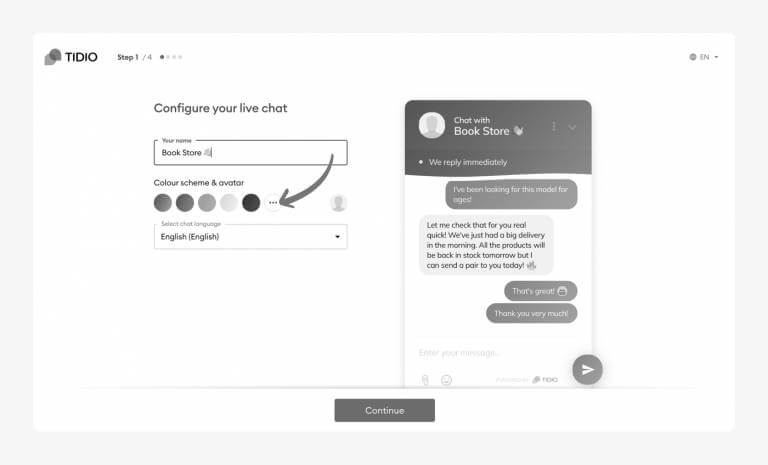
An advanced feature is setting up different languages based on visitors’ browser settings. You just need to provide a default welcome message in your primary language, and it’ll be translated into others you want to support.
Tip: Turn on sound notifications to alert visitors when you’ve replied. They’re helpful because people often get sidetracked, minimize the screen, or switch to another page while waiting for a response from the agent.
Step 4: Set up your operating hours
Your website visitors should know when your support team is around to help with their questions. To prevent frustration for them and missed opportunities for you, it’s important to set up operating hours for your live chat.
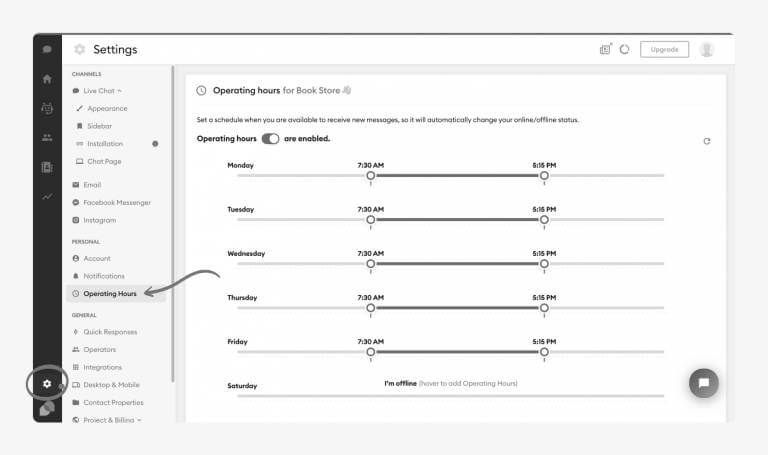
You can do this in just three simple steps:
- Go to your Settings tab.
- Select Operating hours.
- Toggle the switch to enable operating hours.
Step 5: Make canned responses
Canned responses are pre-written replies that your support team can use for common questions. They help you reply faster and reduce the amount of manual work for your agents.
Here’s how to set them up:
- Go to the Settings tab and click on the Canned Responses section.
- Choose “Add a new Canned response.”
- Write your message.
- Once you’re satisfied, click the Save button.
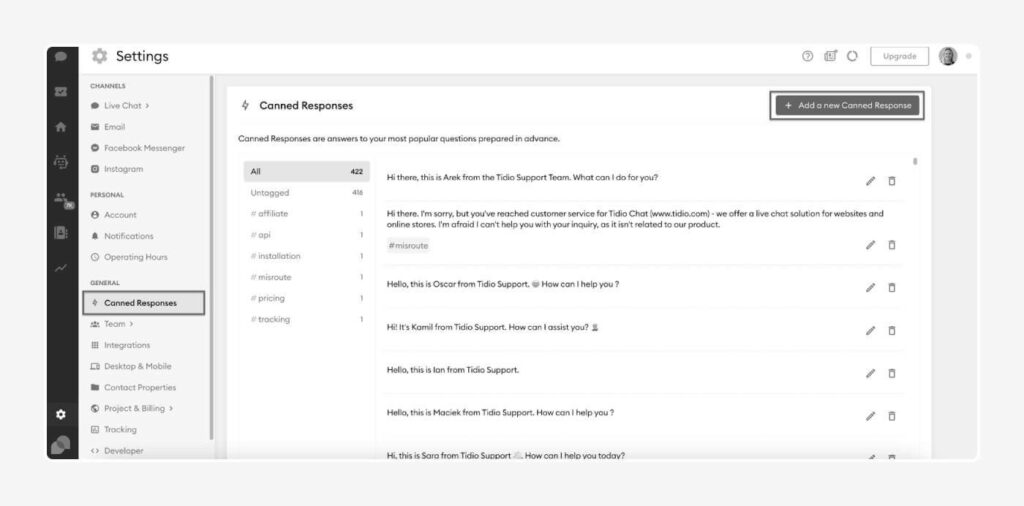
Remember, you can edit or delete your messages anytime.
Additionally, check for features that allow you to manually respond to a customer if needed.
Step 6: Download Mobile and Desktop Apps
A convenient feature of live chat is its accessibility on the go. When integrating chat into your website, it’s essential for you and your team to also install the mobile and desktop apps for streamlined client communication.
With these apps, you can address customer inquiries, monitor visitor lists, and update client information directly from your mobile device. This flexibility means you and your support team aren’t tied to a desk all day to assist clients.
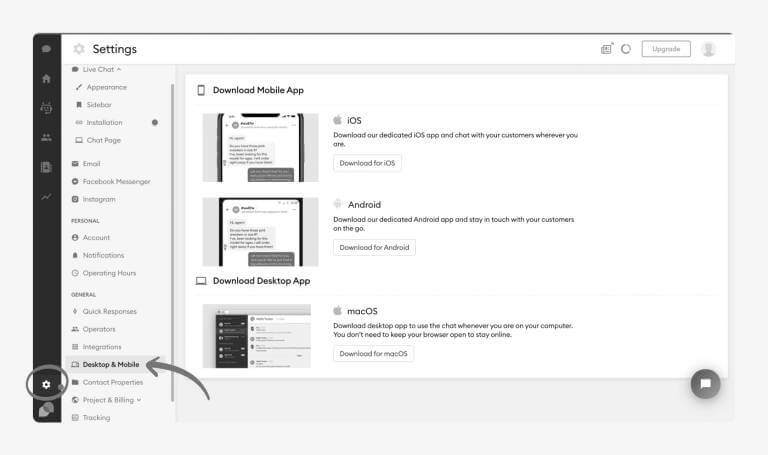
To install the app, ensure your device meets the requirements: Android 4.1 and higher or iOS 9.0 and higher for the mobile app.
Step 7: Integrate Email, Messenger, and Instagram
Leverage the integrations provided by your chat vendor for enhanced efficiency. Key integrations include email, Facebook Messenger, Instagram, and CRM systems.
Messenger integration enables chat agents to communicate with clients both on your Facebook page and website. Furthermore, integrating Instagram allows you to respond to subscriber reactions to your stories.
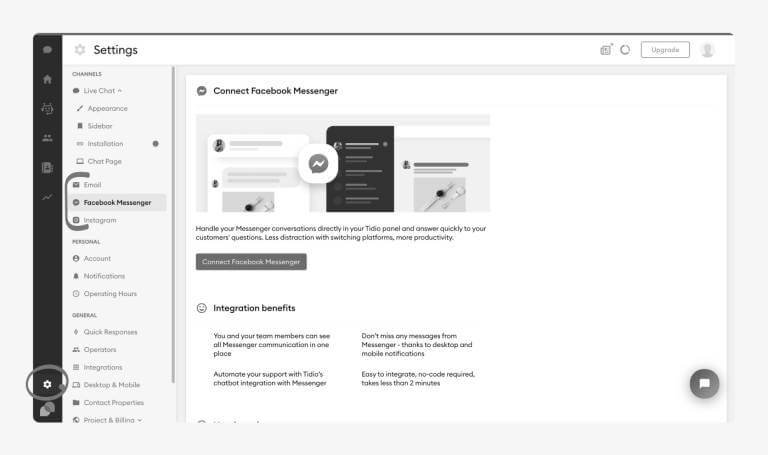
Additionally, you can centralize customer communication in one dashboard to simplify support operations. Implementing chatbots to address frequently asked questions not only saves time but also improves the customer experience with instant responses.
Step 8: Implement Chatbots
Creating a chatbot for your website is straightforward. Begin by using a visual editor to drag and drop building blocks or customize provided templates from the platform. Here’s how it’s done:
- Log in and navigate to the bot builder section.
- Choose whether to build your chatbot from scratch or utilize a template.
- Determine triggers and actions for the bot, including any conditions for its operation.
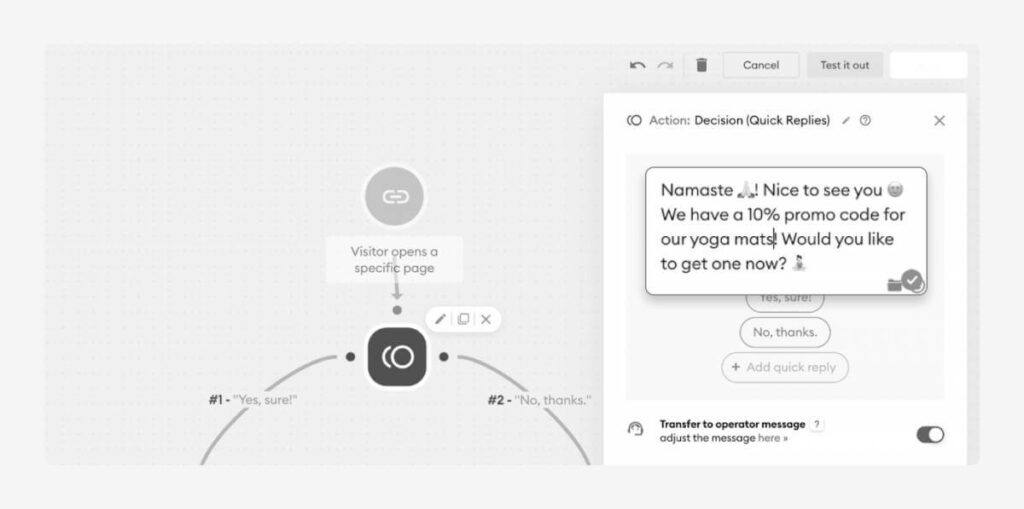
For instance, if you aim to generate more leads, you can deploy a chatbot offering a promo code for your yoga mats in exchange for the visitor’s email address.
For this, select the “Visitor opens a specific page” trigger, specify the page, compose your message, and provide options for the visitor to choose from. Create actions for each response, such as asking for the code. Ensure to toggle the option to save the email address as a contact property for future reference.
Step 9: Add your contacts
Before uploading contacts, organize the data in Google Sheets with proper headers, such as Name, Surname, Email, Country, and Phone Number.
After preparing the data, save it as a CSV file. Then, go to the Contacts section on your admin page and click “Import from file.” A new panel will appear where you can drag and drop the CSV file.
Next, match your data with the right attributes from the contact list. Confirm the mapping under the columns. To complete the import, choose whether to update existing contacts or not. Both options will add new contacts to your list.
Finally, ensure all new contacts have given permission to be contacted. Once done, your sales team will have a complete list of leads.
Step 10: Customize Messages
Customize the message customers see before they start chatting. Let them know your support team is available to help with any questions.
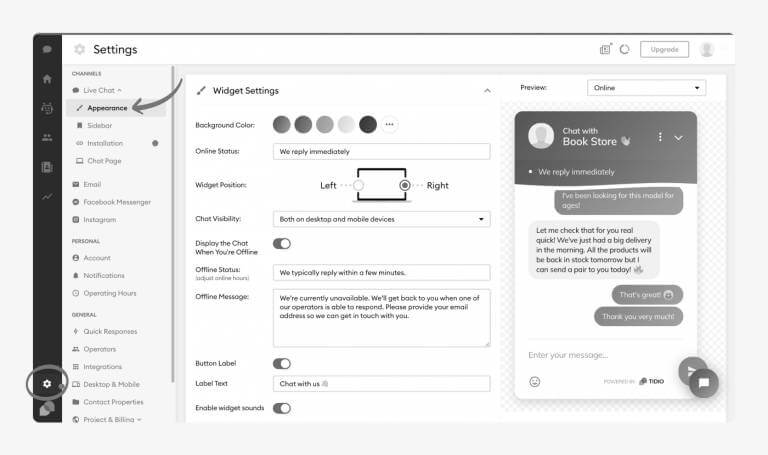
This can be done in the Appearance page’s Settings. You can also adjust the online and offline statuses and the offline message for after-hours visitors.
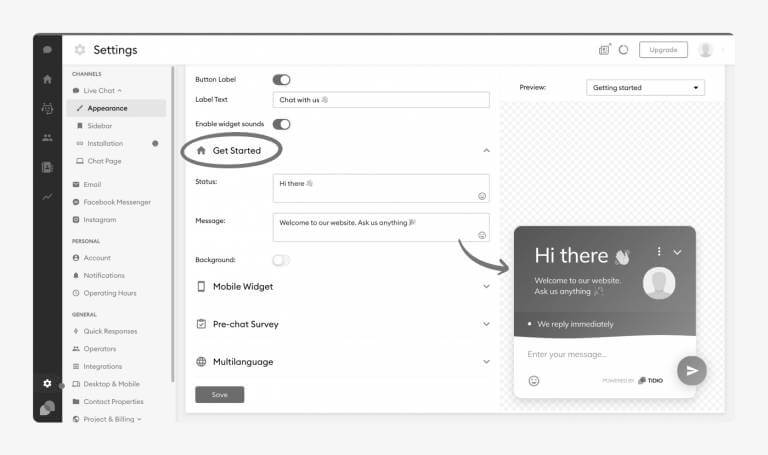
Click “Get Started” to see more options. Now that you’ve added live chat to your website and set up the basics, explore your dashboard and other app features.
The main menu on the left lets you access all the live chat tools. One of them even shows real-time site visitors, so you can reach out to them proactively!
Step 11: Track Performance Metrics
To learn and improve, it’s important to monitor how well your live chat agents and chatbots are doing. You can set up post-chat surveys to measure customer satisfaction and their likelihood to recommend your company.
Key metrics include:
- Customer Satisfaction Score (CSAT)
- Customer Effort Score (CES)
- Net Promoter Score (NPS)
- Customer churn rate
- Average response time
- First Contact Resolution (FCR)
- Unresolved query backlog
Go to your Settings and select the Customer Satisfaction tab. From there, you can enable and customize messages to ask visitors for feedback.
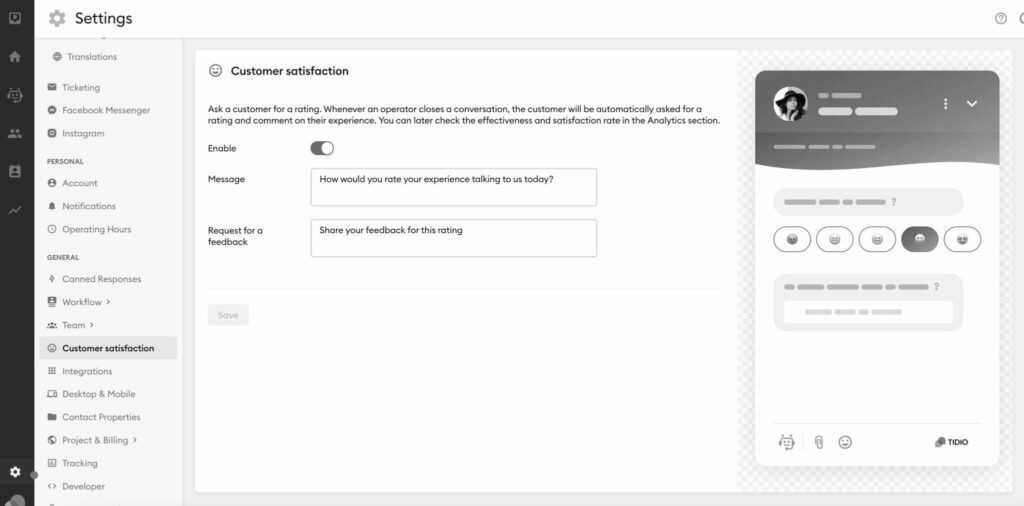
So that marks the end of our step-by-step guide to embed chat in website. However, if these steps are too complicated, you can explore Saufter’s live chat.
Saufter: Next-Gen Live Chat Software
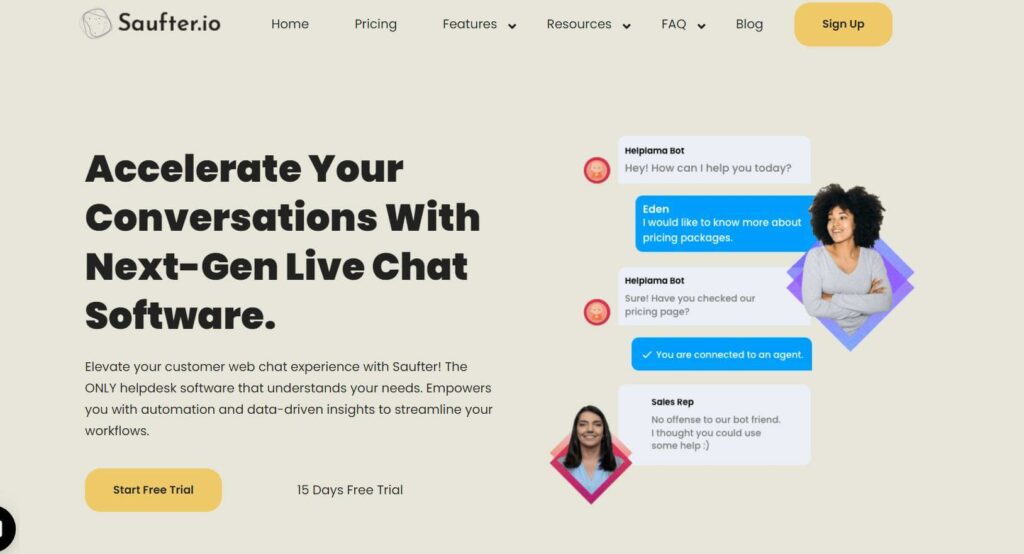
Elevate your customer web chat experience with Saufter! Saufter is not just another helpdesk software; it’s the ONLY solution that truly understands your needs. Empower your business with automation and data-driven insights to streamline workflows and enhance customer satisfaction.
Key Features
- Automate E-commerce Workflows: Simplify customer tasks with automated workflows tailored for e-commerce stores, including order tracking and returns processing.
- Recruit Experienced Agents In One-Click: Find and test experienced customer service professionals from Saufter’s marketplace based on your past interactions, ensuring quality support for your business.
- Measure Performance and Access Real-Time Reports: Monitor key metrics like volume, response time, and customer feedback with Saufter’s real-time dashboard and up-to-the-minute reports, optimizing your support performance.
- Seamless Omni-Channel Communication: Expand beyond web chat by integrating phone, SMS, email, and social media platforms.
- Collaboration: Enhance team collaboration with apps like Slack, and integrate messaging channels such as Facebook Messenger and WhatsApp.
To Sum It Up
In conclusion, the process to embed chat in website is simple and can be completed in just 10 minutes. By following the steps outlined in this guide, you can enhance your website’s interactivity and provide immediate support to your visitors.
Additionally, if the process seems complex, we suggest you take a look at Saufter’s live chat. The platform seamlessly integrates with multiple channels so you can connect with your customers where they are. Saufter also allows you to set up complete or partial automation, giving you complete control over the AI functionality.
So, what are you waiting for? Sign up now and take Saufter for a spin!


