Last Updated: July 2025
Unlock seamless collaboration with the step-by-step guide on Jira integration with Salesforce. In seven easy steps, you can streamline the project management and customer relationship processes, achieving enhanced efficiency and synergy.
Explore the power of Jira integration with Salesforce for a harmonized and productive workflow.
JIRA Unveiled
In the realm of project management, Atlassian’s JIRA is a tool that has gained broad acceptance. Its design is centered around empowering teams to plan, track, and manage their work in an optimized manner.
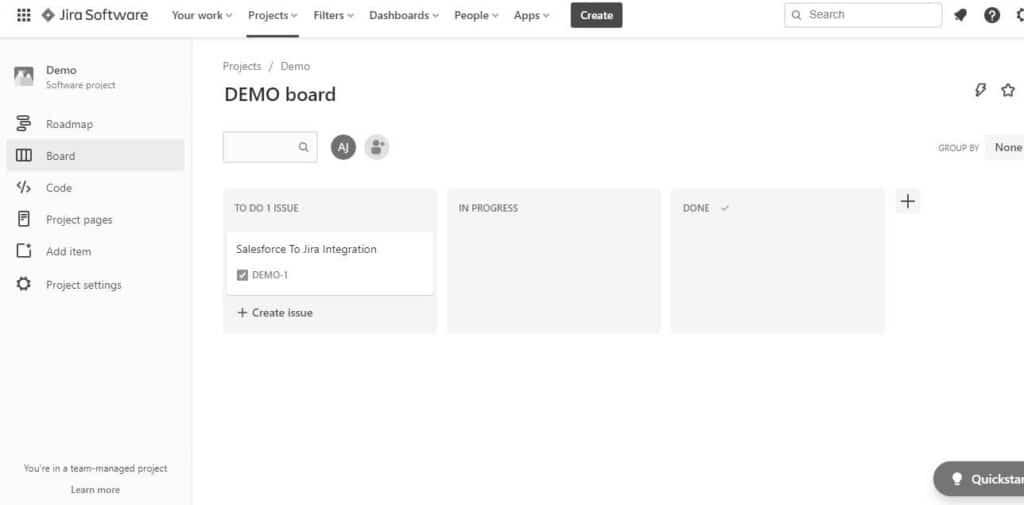
Key features
- Issue Tracking: JIRA’s primary strength lies in its issue-tracking capabilities.Teams can create, prioritize, and track issues throughout their lifecycle. Issues can include tasks, bugs, stories, and more.
- Customizable Workflows: JIRA allows teams to define and customize workflows to match their specific processes.
- Agile Project Management: JIRA is a standout choice in Agile project management, particularly for its adept support of Scrum and Kanban practices. It provides tools for backlog management, sprint planning, and visual boards for tracking the progress of tasks.
- Roadmaps: JIRA enables teams to create visual roadmaps to plan and communicate long-term project goals. It helps teams align their work with overall project objectives.
- Custom Fields and Screens: JIRA is highly customizable. Teams can define custom fields and screens to capture and display specific information relevant to their projects.
- Integration with Development Tools: JIRA integrates with various development and collaboration tools, such as Confluence, Bitbucket, and GitHub.
Demystifying Salesforce
As a premier cloud-based CRM platform, Salesforce empowers businesses by managing and streamlining a wide array of customer interactions.
Key features
- 360-degree customer view: Salesforce presents a comprehensive view of each customer, consolidating information from various touchpoints. This holistic perspective enables businesses to understand and engage with their customers more effectively.
- Sales Cloud: The Sales Cloud module in Salesforce is to enhance sales productivity. It includes features for lead management, opportunity tracking, sales forecasting, and automation of repetitive tasks.
- Service Cloud: Service Cloud facilitates businesses in delivering service experiences that stand out. Service agents can efficiently resolve issues and provide personalized service.
- Analytics and reporting: Salesforce offers robust analytics and reporting tools that strengthen businesses to derive insights from their data. Users can create customizable reports and dashboards to track key performance indicators and make data-driven decisions.
- Artificial Intelligence (AI) with Einstein: Salesforce’s Einstein AI integrates machine learning and predictive analytics into the platform.
- Customization and integration: Salesforce allows businesses to tailor the platform to their unique needs. It seamlessly integrates with third-party applications and systems, ensuring a connected and efficient ecosystem.
Strategic Integration: Salesforce and Jira for Smarter Operations
1. Generate and Handle Jira Tickets
The Salesforce support team can elevate a Salesforce case to a Jira ticket seamlessly. It empowers support representatives to initiate, connect/disconnect, modify, duplicate, and monitor a Jira issue without having to navigate away from the Salesforce platform.
2. Include Attachments and Post Comments
The support team can effortlessly append attachments and comments to an existing Jira ticket directly within Salesforce. These supplementary details aid the product team in comprehending customer issues and expediting the resolution process.
3. Search for Previously Created Jira Tickets
Support personnel can search for existing Jira tickets before initiating a new one. If a relevant ticket has been resolved, it serves as a valuable knowledge base for promptly addressing escalated cases.
Alternatively, if the existing ticket remains unresolved, the escalated case can be linked to it for reference.
4. Assigning Importance to Jira Issues
Support team members can designate priority levels, such as High, Medium, or Low when generating a Jira ticket. It allows the product team to efficiently prioritize and address issues based on their urgency and impact.
5. Navigating Responses to Escalated Matters
It enables the engineering team to address escalated issues directly from Jira without switching between instances. This streamlined process enhances efficiency and responsiveness in handling critical support matters.
The Significance of Salesforce and JIRA Integration
- Efficient workflows: Integrating Salesforce and Jira streamlines processes, ensuring a seamless transition from customer support in Salesforce to issue resolution in Jira.
- Enhanced collaboration: Centralizing information improves communication across teams, promoting collaboration between sales, support, and development.
- Data accuracy: Bidirectional syncing maintains consistent and accurate data between Salesforce and Jira, reducing errors and discrepancies.
- Quick issue resolution: Real-time updates in Salesforce empower support teams to track and update Jira issues swiftly, expediting the resolution process.
- Informed decision-making: Unified reporting and dashboards provide comprehensive insights, aiding informed decision-making based on data from both Salesforce and Jira.
- Customer satisfaction: Respond to escalated issues directly from Jira, contributing to faster resolutions and heightened customer satisfaction.
Let’s move on to the step-wise approach for Jira integration with Salesforce.
Jira Integration with Salesforce – A Stepwise Approach
Embark on efficiency with the Jira-Salesforce integration, navigating through seamless collaboration in just 7 simple steps.
Step 1: Setting up the Peeklogic Connector Package in Salesforce
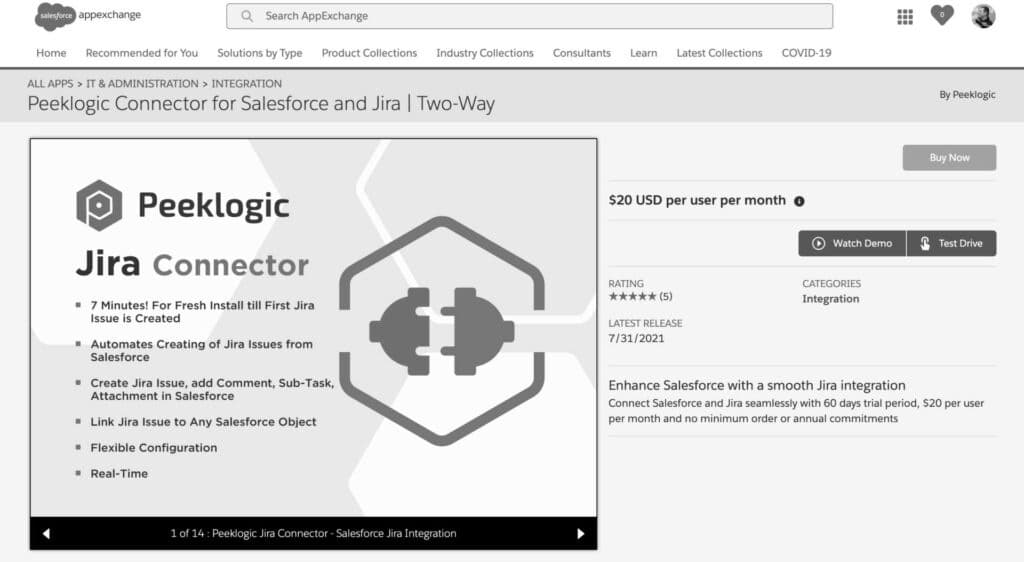
Locate the Peeklogic connector on the Salesforce AppExchange and click “Buy now.”
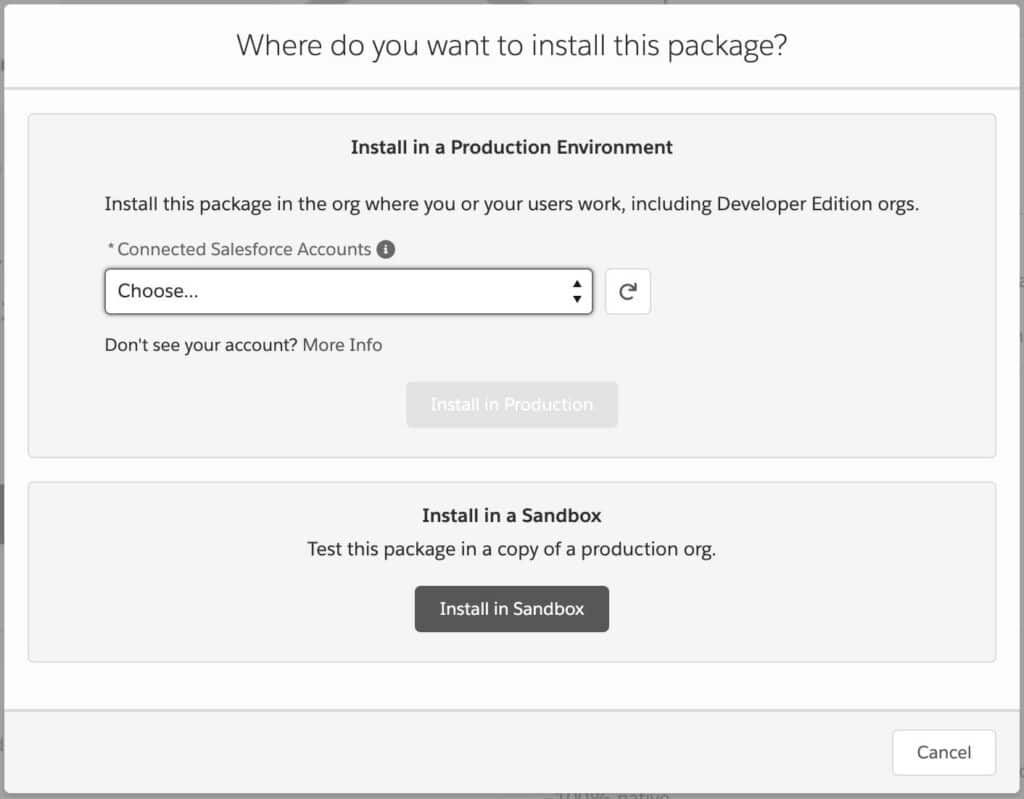
A dialogue box will present the options ‘Install in Sandbox‘ or ‘Install in Production.’ Make your selection for the installation destination.
The subsequent package installation landing page asks you whether the package is for admins, all users, or specific individuals. Adjust your choice based on your preferences.

Step 2: Setting up the Peeklogic Connector Package in Salesforce
Access the link for details on the installation and configuration of the Peeklogic Jira Connector.
Step 3: Enable Salesforce for External Server Calls
For Salesforce to make external server calls, create a remote site setting. Head to Setup, type ‘Remote Site Settings‘ in the quick find box, select ‘Remote Site Settings,’ and opt for ‘New Remote Site.’
Complete the form by entering the Name and URL for the remote site settings, then save your changes.

Step 4: Saving Jira Credentials within Salesforce
In Salesforce, Jira credentials are stored using a custom setting. The custom settings comprise essential fields like Jira URL, Jira Username, Jira Password, and Jira API Token. These credentials are essential for subsequent API callouts.
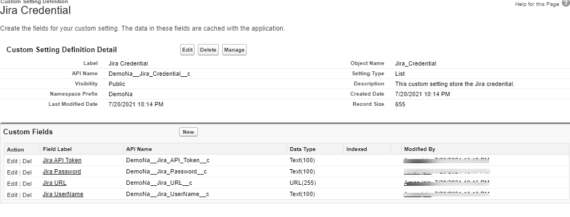
Step 5: Arrange a Process Builder
To create a JIRA issue from Salesforce, trigger a POST REST request. The URL Endpoint mentioned below is specifically for generating issues in JIRA.
JIRA_URL/rest/api/2/issue
Visit Setup, type “Process Builder” in the quick find box, and access Process Builder. Select “New,” fill in the process name, choose the object name, and specify the conditions for initiating the process.
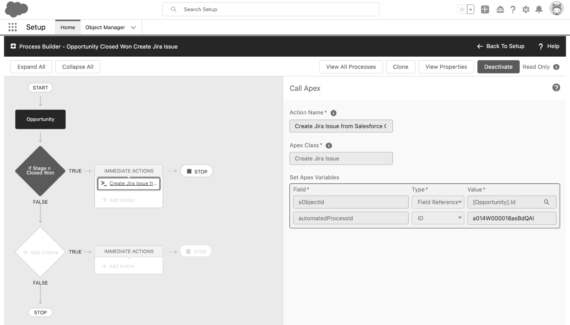
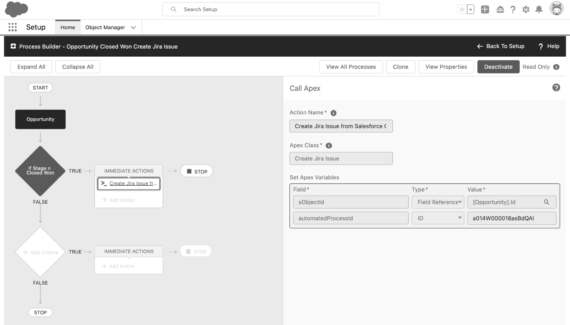
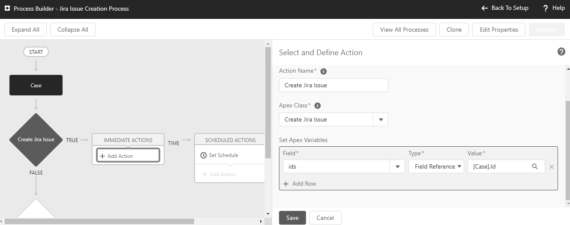
Define the circumstances under which the action should be executed. To introduce the action, click ‘Add action‘ and opt for Apex as the action type. Outline the action name and the associated Apex class.
Step 6: Fetch Issue
For retrieving an existing issue in JIRA from Salesforce, make a GET REST request. JIRA’s RESTful APIs utilize the issue key or ID for fetching issues. The URL Endpoint specified below is for retrieving existing issues in JIRA.
JIRA_URL/rest/api/2/issue/{issueIdOrKey}
Step 7: Add a Comment to an existing issue
For appending comments to an existing JIRA issue from Salesforce, initiate a POST REST request. Utilize the URL Endpoint provided below, specifically crafted for the addition of comments to an existing JIRA issue.
JIRA_URL/rest/api/2/issue/comment
Also, read How to set up a Jira Salesforce Integration In 2025
Conclusion
Elevate project management with Jira-Salesforce integration in 7 easy steps, fostering a harmonious workflow. Unleash efficiency and collaboration effortlessly, propelling your team towards enhanced productivity and success.
Revolutionize customer support with Saufter.io – a seamless platform for efficient query resolution. Simplify ticket management, enhance communication, and boost customer satisfaction effortlessly with Saufter.io.


