
Last Updated: December 2025
Enhancing the security of your Shopify store is paramount in today’s digital landscape, and the Shopify Authenticator App is a valuable tool to achieve just that.
This guide takes you through the essential steps to set up two-step authentication, providing your e-commerce business with an extra layer of protection. By implementing this security feature, you not only boost your peace of mind but also protect your customer’s data.
Let’s explore these crucial steps to fortify your online store against potential threats while maintaining a seamless shopping experience for your valued patrons.
Table of contents
- Understanding Shopify Two-Factor Authentication (2FA)
- Shopify Authenticator App: Types of Two-Step Authentication
- Setting Up Two-Factor Authentication on Shopify
- Setting Up Two-Step Authentication Using Shopify Authenticator App
- Setting Up Two-Step Authentication Using a Security Key
- Setting Up Two-Step Authentication With SMS Verification
- Disabling Two-Step Authentication in Shopify
- Get Shopify Authenticator App on Your Mobile Device
- Meet Saufter, the E-commerce Specialist with an order-tracking capability
Understanding Shopify Two-Factor Authentication (2FA)
Shopify two-factor authentication (2FA) is an extra layer of security that helps protect your Shopify account. You need to input a code from either an authentication app or a text message, in addition to your password, during the login process.
This makes it much harder for unauthorized users to access your online store.
Shopify Authenticator App: Types of Two-Step Authentication
SMS Verification
In SMS verification, a code is sent via text message to the user’s registered mobile number. To confirm their identity, users input this code along with their password.
Security Key
Shopify also accommodates physical security keys like YubiKey. These devices serve as tangible authentication keys, inserted into or used with devices through NFC or USB connectivity to confirm identity.
Built-In Authenticator
Alternate methods include features like fingerprint sensors that authenticate your identity during login.
Authenticator App
It is an app that generates a QR code, which is then scanned and verified at the time of login.
Shopify Mobile Prompts
This approach provides prompt notifications when your account is accessed from other devices.
Now, let’s take a look at the steps to set up a two-factor authentication for your Shopify store.
Setting Up Two-Factor Authentication on Shopify
- Start by signing in to your Shopify administrative dashboard.
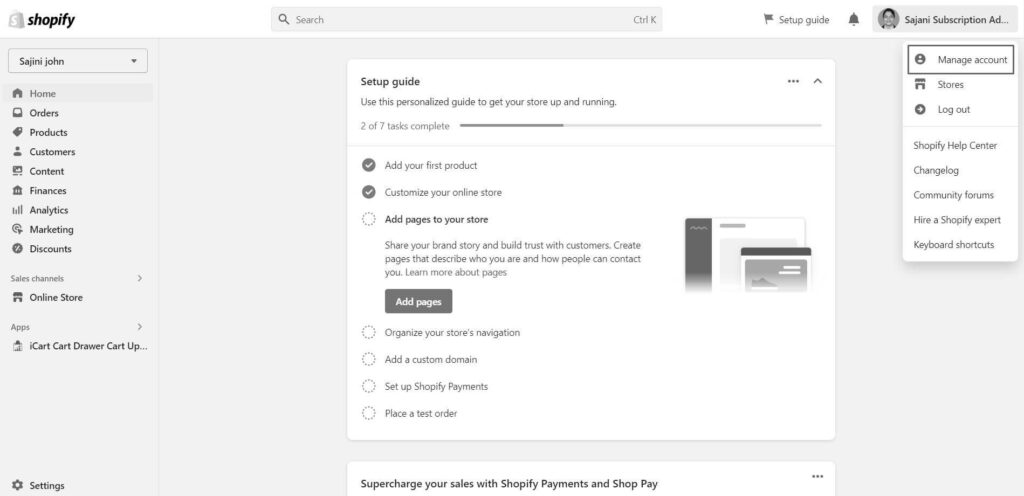
- In the top right corner, click on your Account Name or Email.
- Select the “Manage Account” option.
- You’ll be directed to a new page with two options: “General” and “Security.” Click on “Security.“
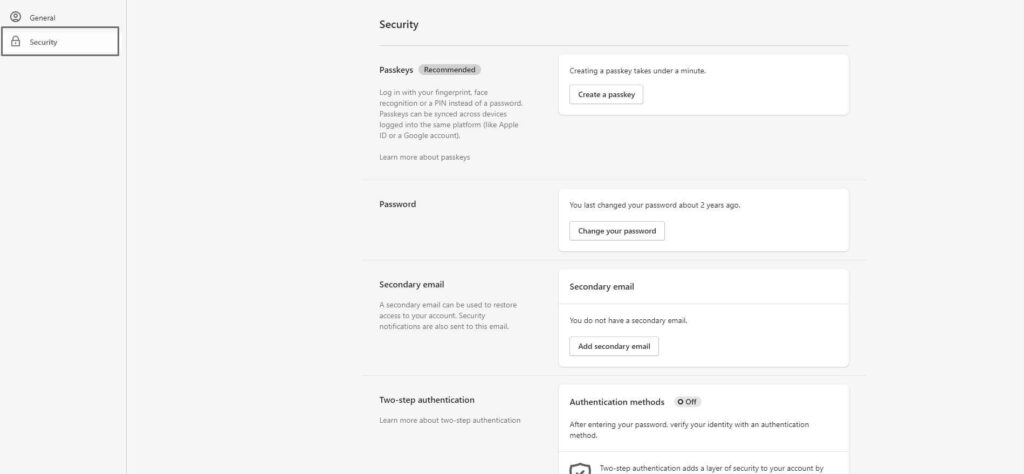
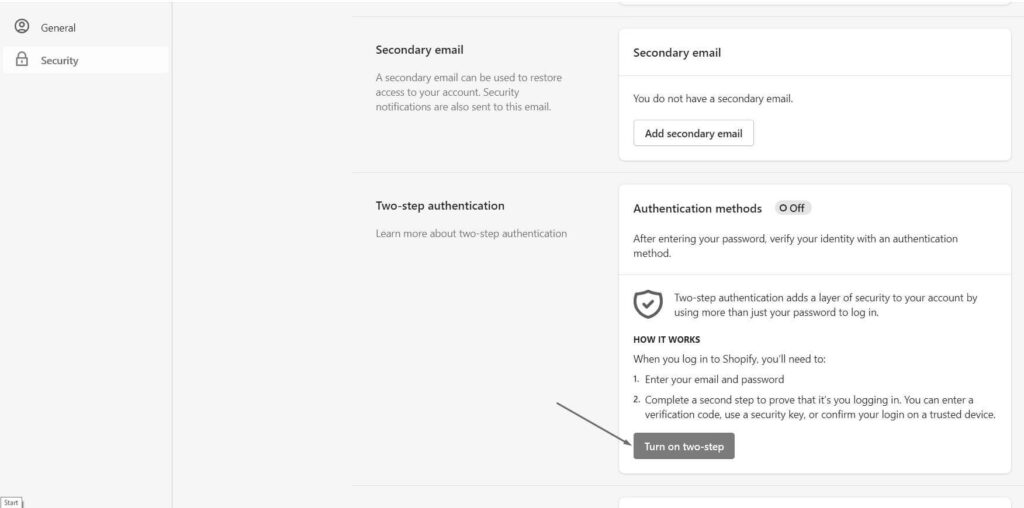
- Scroll down until you find the “Two-step authentication” section and click the “Turn on two-step” button.
6. A popup will appear with various options. Choose “Authentication app.”
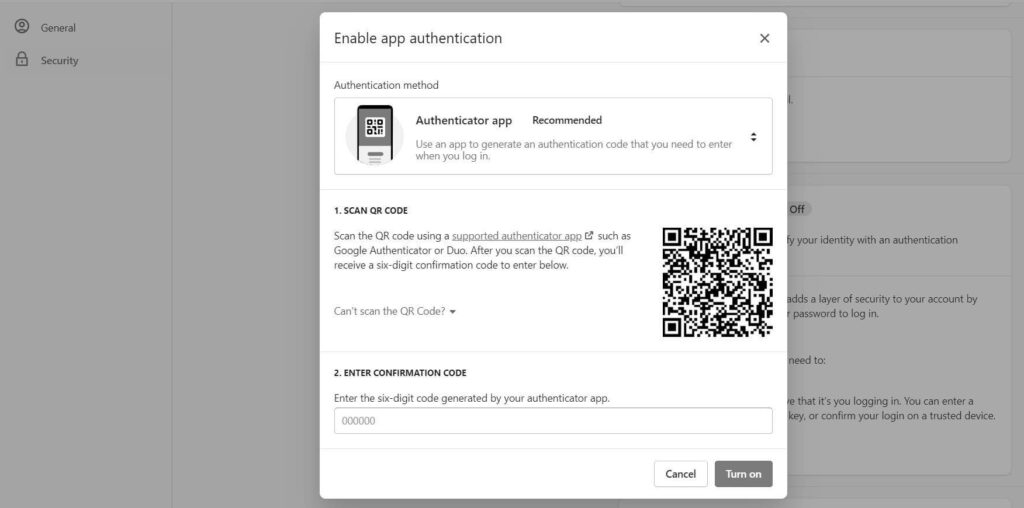
- Follow the instructions for scanning the QR code. You’ll need an authenticator app like Google Authenticator to scan the code. After scanning, enter the 6-digit code generated and click “Turn on.”
Important: Make sure you download the codes and save them.
Afterward, choose your preferred method for setting up two-step authentication (2SA). You have the option to establish 2SA using an authenticator app, a security key, or an SMS. We’ll discuss all three methods in detail below.
Setting Up Two-Step Authentication Using an Authenticator App
Shopify highly recommends this method for its enhanced security.
Step 1:
Opt for the Authenticator app option and click Next. On your mobile device, open your authenticator app, select “Add Account,” then “Scan QR Code,” and aim your camera at the QR code. Tap “Save.”
If you can’t scan the code, choose “Enter Code Manually” and input the 32-character key visible in Shopify.
Step 2:
Return to your desktop and provide your Shopify password in the designated field, followed by the 6-digit code generated by the app. Click “Enable” when you’re ready. Email confirmations will be sent to both your primary and secondary email addresses.

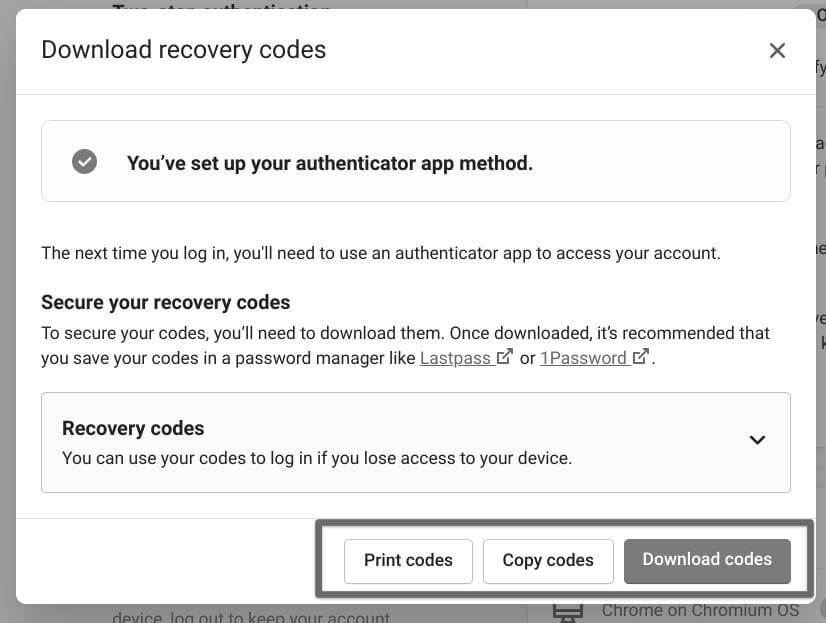
Step 3:
On the “Download recovery codes” page, you’ll find ten recovery codes. Select the appropriate option to print, copy, or download them. These codes serve as a backup for accessing your account if you lose access to your authenticator app.

Keep them in a secure location. Close the dialog box once you’re finished.
Setting Up Two-Step Authentication Using a Security Key
Keep in mind that security keys, much like your phone’s fingerprint reader, are device-specific. To sign in on another device, you’ll need to either add another security key or opt for a different two-step authentication method.
If you still prefer to use a security key, select “Security key” and click “Next.”

1. Provide a name for your security key and input your Shopify password. Once you’ve finished these steps, click on “Add device.”

- Your web browser will ask you to configure your security key. Click “OK” to proceed. Then, insert your security key into your computer’s USB port to continue the setup process.
- After activating your security key, you’ll have access to ten recovery codes that can be printed, copied, or downloaded. In case you lose access to your security key, these recovery codes are the only way to regain access.
Note: Remember that each code is single-use.
Setting Up Two-Step Authentication With SMS Verification
If you opt for SMS as your preferred method, follow these steps:
- Choose “SMS delivery” and click “Next.“

2. Select your country code, input your mobile phone number, and click “Send authentication code” once you’re ready. Shopify will send a code to this number every time you access your account.

- Enter the 6-digit authentication code sent to your phone, followed by your Shopify password, and then click “Enable.“
Once enabled, you’ll receive ten recovery codes, just like with other two-step authentication methods. You can print, copy, or download them and keep them in a secure place. Close the dialog when you’re finished.
Recommended: Top 5 Shopify Sales Booster Apps for 2025 [Tried &]
Disabling Two-Step Authentication in Shopify
If you’ve determined that you no longer require the extra security and wish to deactivate two-step authentication for your Shopify account, follow these steps:
- Sign in to your Shopify account and access your profile.
- Click on “Manage account.“
- In the left-side menu, select “Security.“
- Scroll down to the “Two-step authentication” section and click “Remove” next to your phone number.
- Now, enter your password and click “Remove.” Two-step authentication will be turned off, and all future logins will only necessitate your password.
Get Shopify Authenticator App on Your Mobile Device
You’ll need an authenticator app that can scan QR codes and fetch authentication data. Some recommended authenticator apps are:
1. Google Authenticator (Android/iPhone)
Google Authenticator bolsters the security of your online accounts by introducing a supplementary verification step during the sign-in process.
This entails that, alongside your password, you must also input a code generated by the Google Authenticator app on your mobile device.
Notably, the verification code can be generated by the Google Authenticator app on your phone, even in the absence of a network or cellular connection.
2. Duo Mobile (Android/iPhone)
Duo Mobile collaborates with Duo Security’s two-factor authentication service to heighten the security of login processes. This app generates login passcodes and can also receive push notifications for effortless, one-tap authentication.
Furthermore, you have the option to employ Duo Mobile for managing two-factor authentication across various applications and online services that rely on passcodes.
Please keep in mind that, for Duo accounts, you must activate and link Duo Mobile to your account to make it operational.
3. Amazon AWS MFA
Implementing multi-factor authentication (MFA) within AWS Identity and Access Management (IAM) is a recommended practice. It necessitates an additional layer of authentication, supplementing the conventional username and password sign-in credentials.
You have the option to activate MFA at the AWS account level for both root and IAM users created within your account.
When MFA is enabled, logging into the AWS Management Console necessitates entering your username and password (what you know). You must also provide the authentication code generated by your MFA device or, in the case of biometrics-enabled authenticators, utilize biometric data.
This combination of factors substantially heightens the security of your AWS accounts and resources.
Ensure you follow the app’s instructions closely when installing it, as Shopify support can’t assist in setting up these third-party apps on your mobile devices.
Now, allow us to introduce you to an all-in-one helpdesk with powerful order-tracking features!
Meet Saufter, the E-commerce specialist with an order-tracking capability
Saufter presents an efficient and user-friendly alternative to Rush for order tracking. This robust tool comes with a comprehensive set of features that ensure you’re always informed about the status of your orders.

Key Features
- Real-Time Order Tracking: Benefit from an automated scanning system that provides vital updates on your orders, including location, delivery status, expected delivery dates, and more in real-time.
- Automated Order Monitoring: Saufter continuously monitors your orders around the clock, promptly notifying you of any potential delays.
- E-commerce Workflow Automation: Streamline your e-commerce workflows by automating repetitive tasks such as handling returns/exchanges, order modifications, address changes, and more.
- Comprehensive Order History: Saufter offers a unified view of your customers’ complete order history.
- Live Chat + Knowledge Base: Empower your customers to find answers to common queries through the combination of live chat and a knowledge base.
- Smart Reports and Insights: In addition to key performance metrics, gain valuable insights into trends like spikes in refunds and order delays.
Conclusion
In conclusion, setting up two-step authentication with the Shopify Authenticator App is a crucial step in fortifying the security of your online store.
This comprehensive guide has walked you through the process, offering clear, step-by-step instructions to ensure your Shopify account is safeguarded against unauthorized access. We hope it was helpful.
Moreover, to ensure flawless execution of your order management tasks, consider adopting Saufter, a fully automated customer support tool seamlessly integrated with Shopify.
Click below to start your free trial!


