Shopify theme development is a crucial aspect of creating a unique and engaging online store. In this step-by-step guide, we will walk you through the process of building a customized Shopify theme from the ground up.
Whether you’re a seasoned developer or just getting started, this comprehensive resource will help you craft a visually appealing and functional theme for your e-commerce business.
Shopify Theme Development: Custom vs Prebuilt theme
Aspect | Pre-Built Shopify Theme | Custom Shopify Theme |
Ease of Setup | Quick setup | More time needed |
Customization Options | Limited | Extensive control |
Design Quality | Attractive designs | Design from scratch |
Technical Skills Required | Minimal | Coding expertise |
Scalability | Good for beginners | Highly scalable |
Cost | Cost-effective | Potentially costly |
Conversion Optimization | Varies by theme | Tailored for CRO (Conversion Rate Optimization) |
Uniqueness | Can look generic | Unique design |
Recommended: Shopify Theme Detector: How to identify Shopify Theme?
Shopify Theme Development: Need to change the current theme
It’s reasonable to expect your store’s growth. As it expands, your theme must adapt to handle increased demand.
You’ll require greater control over page layout and elements, as well as flexibility for testing content placement and measuring its impact on user experience and conversions.
Customization ensures a unique and memorable brand experience, avoiding the common look of widely used themes.
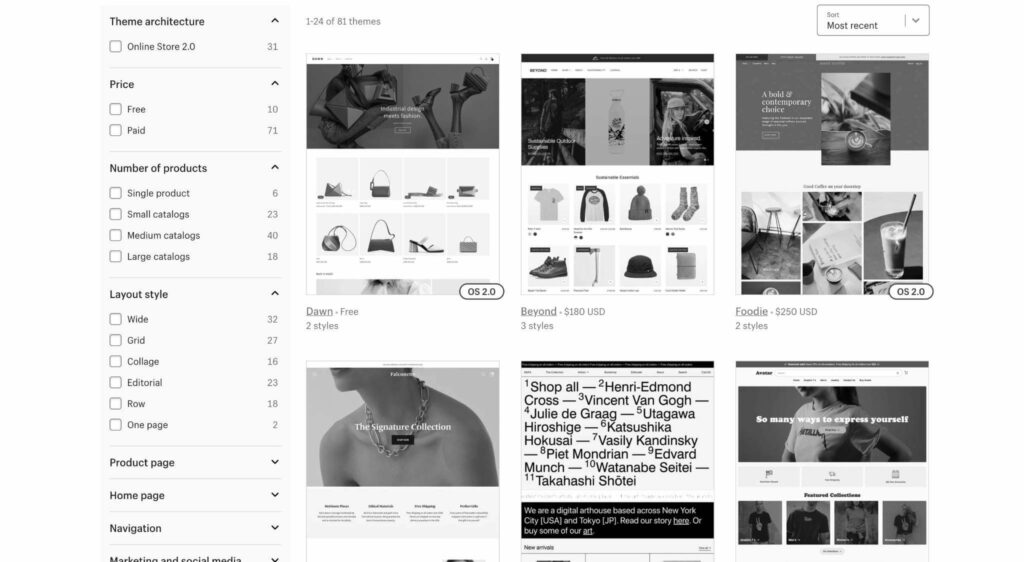
Fortunately, transitioning from a standard Shopify theme to a customized or fully bespoke one is simple. Shopify allows up to 20 themes in your library, enabling theme changes without content loss.
Shopify Theme Development: Create a Website Template
Your store layout must ensure a smooth customer journey from entry to checkout, akin to how retail stores guide shoppers toward the register with strategic cross-selling.
This well-planned journey is your sales funnel. When strategizing your store, treat element placement as stages in this journey.
Consider the following:
- Entry point (the initial page they start on).
- Customer intent (e.g., seeking a black t-shirt or gift ideas).
- First action (clearly guide them with a search or promotion).
- Progression to subsequent steps.
- Streamlining the journey (minimize steps to their goal).
- Placement of secondary elements/links (e.g., blogs, returns, related items, testimonials).

When planning your page layout, focus on creating an enjoyable shopping experience with minimal friction. Combine site mapping and wireframes to design the layout efficiently.
Creating a Swift Shopify Website Design
While the content and products in your store may vary, certain standard pages are essential for a successful store. Focus on designing appealing and user-friendly layouts for these key pages:
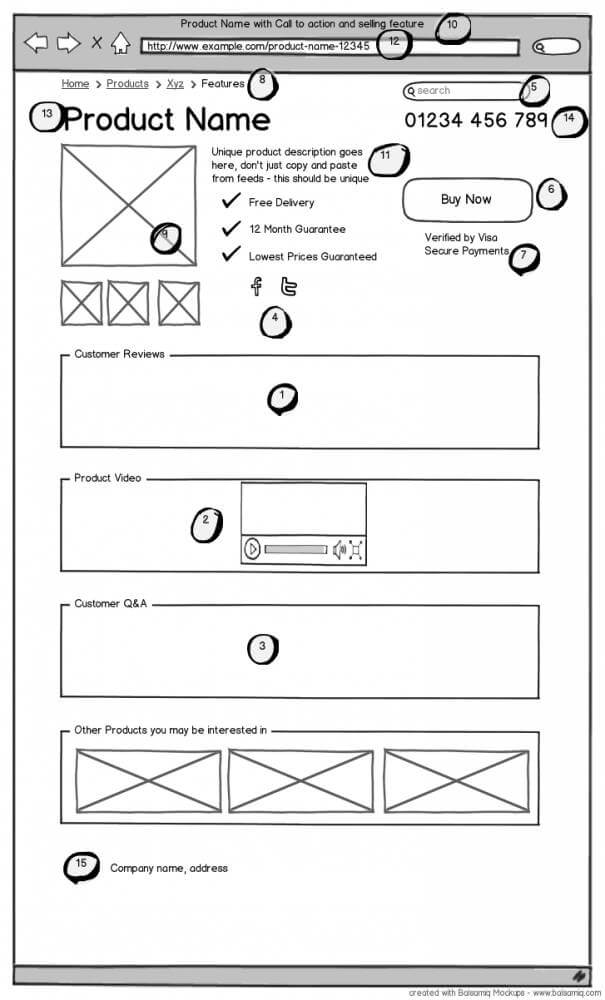
- Homepage: Features a clear value proposition, intuitive navigation, and compelling calls to action.
- Landing pages: Include well-placed, attractive images, stock levels, and sales countdowns to create a sense of urgency.
- Product pages: Optimize product titles, incorporate customer testimonials, and ensure easy add-to-cart functionality.
- Collection pages: Group products by brands, customer interest, promotions, and more for improved discoverability and reduced friction.
- Blog: Consider a blog page to enhance your site’s ranking and visibility in customer searches, though it’s not mandatory.
Shopify Theme Development: Create a Theme From Scratch
Once your site is planned, it’s time to start building. Creating a custom Shopify theme is a potentially costly and time-consuming endeavor, especially if you lack coding experience. You may need a developer’s assistance to ensure a smooth design and implementation process.
Exploring the Inner Workings
For the adventurous who are familiar with CSS and HTML, self-managing Shopify theme development is an option. Numerous resources introduce you to Liquid, the templating language for custom theme creation.
However, building a Shopify theme from scratch, even with some experience, can be technically challenging. Your decision will ultimately depend on how you wish to invest your time and effort. If you’re ready to proceed, the first step is selecting the right tools for the job.
Essentials for Crafting a Unique Shopify Theme
Creating a custom Shopify theme involves mastering specialized terminology, making the process clearer once you understand the concepts.
You’ll need essential tools for this endeavor, including Shopify CLI (or Theme Kit for pre-Store 2.0 themes), Dawn, and Shopify GitHub integration. Let’s dive into them:
1. Shopify CLI (Command Line Interface)
A CLI is a tool for instructing Shopify. Unlike user-friendly graphical interfaces, CLIs use text-based commands to communicate with Shopify. You’ll need to install Shopify CLI on your machine to inform Shopify about the changes you want in your custom theme.
2. Dawn Theme
Shopify’s reference theme, Dawn serves as your starting point for designing your Shopify store. You’ll clone Dawn to make modifications using Shopify CLI.
Cloning Dawn means saving a copy of its GitHub repository to your local machine, which acts as an instruction manual you regularly update. After renaming your theme, associate it with your Shopify store, and you’ve successfully initiated and authenticated your custom Shopify theme.

3. Shopify-GitHub Integration for Seamless Theme Development
This integration connects your GitHub account with your Shopify store. Once you’ve renamed your repository and customized it through Shopify CLI, you can use Shopify’s GitHub integration to link your newly created theme to your Shopify store.
Using the GitHub workflow is recommended for theme development as it offers version control. Having a Git repository for your theme provides a history and backup. However, remember that any changes made via the Shopify-GitHub integration will be live on your theme.
Therefore, it’s essential to preview and thoroughly test your custom theme before proceeding to the GitHub integration stage, as we’ll explore in more detail later.
Understanding Liquid: Shopify’s Language for Custom Themes
To create your Shopify theme from scratch, you’ll need to acquaint yourself with Liquid, the programming language used for all Shopify themes. Liquid comprises HTML files with embedded code, making it accessible even if you’re not a master backend coder.
If you’re familiar with HTML and CSS, grasping Liquid should not pose a significant challenge. Liquid serves as a conduit between Shopify’s stored data and the code in your customers’ browsers.
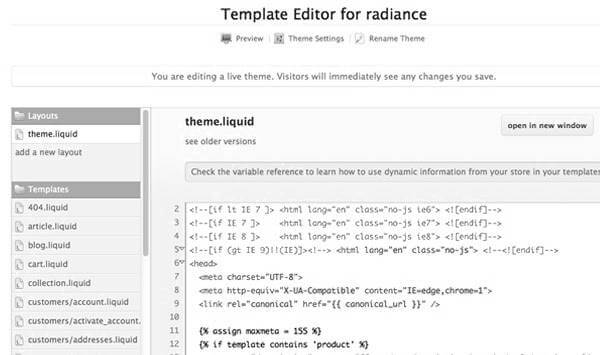
Shopify already includes much of the functionality for an e-commerce store, so you primarily need to learn how to modify how the content is presented. While you’ll still work with CSS and familiar design elements, Liquid empowers you to customize the display of your content.
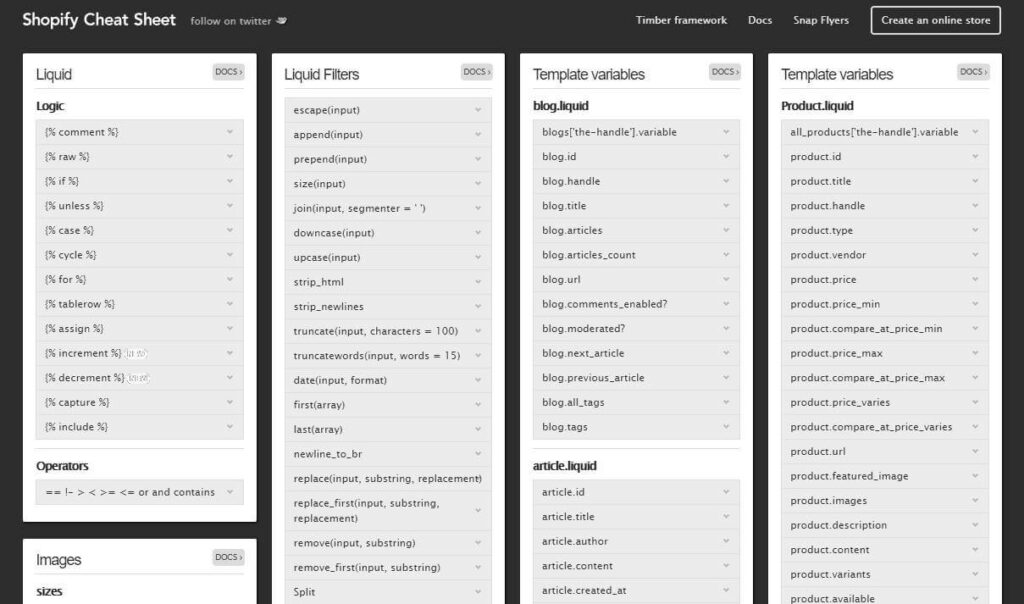
Mark Dunkley from Shopify maintains a current Liquid cheat sheet for individuals crafting their Shopify themes.
Putting It All Together: Building Your Shopify Theme
Now that you have all the pieces, it’s time to create your Shopify theme. Expect some trial and error, and always test before going live. Understanding Shopify’s theme architecture is vital to transforming your e-commerce site plan into a real theme.
Shopify’s theme architecture overview is a great starting point to familiarize yourself with the components of a Shopify theme.
Testing and Previewing Your Theme
After initializing and authenticating your theme in Shopify, it’s essential to preview your work before making it live. This step is particularly important for newcomers to development, as it involves a lot of experimentation to determine the most effective approach.
Shopify enables you to preview your work by creating a development theme. You can do this by running ‘Shopify theme serve’ with Shopify CLI, which requires Google Chrome.
Launch Your Theme
Once you’re satisfied with your theme’s appearance and functionality and have thoroughly tested it, you’re ready to launch. The final step involves linking or ‘pushing’ your theme’s Git repository to your online store through Shopify’s GitHub integration.
Now that you have successfully learned to design your own theme, let’s take a look at Saufter – a helpdesk that can streamline your e-commerce workflows!
Meet Saufter, The Best Helpdesk With E-commerce Workflow Automation!
Saufter enables you to continuously monitor and track your orders around the clock while also providing a platform for addressing customer inquiries and concerns.
Key Features
- Real-Time Order Tracking: Easily monitor your customers’ order status and provide timely delivery updates.
- Automated Order Monitoring: Keep a 24/7 watch on your orders and receive alerts for delivery delays or other issues, allowing you to proactively resolve problems.
- E-commerce Workflow Automation: Streamline processes like returns, exchanges, anti-refund strategies, order modifications, and address updates.
- Comprehensive Order History: Gain a complete view of your customer’s order history to offer personalized customer service.
- Live Chat + Knowledge Base: Combine live chat functionality with a knowledge base to help customers find quick answers.
- Smart Reports and Insights: Access analytical reports and actionable insights related to your business performance.
Conclusion
In conclusion, our guide on Shopify Theme Development offers a comprehensive step-by-step guide to crafting unique and compelling online store themes.
Remember, the journey doesn’t end with the creation of your theme; continuous testing and adaptation are crucial for long-term success in the ever-evolving world of e-commerce.
By following this guide, you’ll be well on your way to building an exceptional online shopping experience for your customers and achieving your e-commerce goals. Additionally, if you need to enhance your e-commerce workflows and provide top-notch customer support, consider Saufter.
Click below to begin your 15-day free trial!


