
What is a Shopify site map?
A Shopify sitemap is a file or page that lists and organizes the structure of a Shopify store’s content. It serves as a roadmap for search engines, providing information about the URLs, their relationships, and metadata such as the last modification date and priority level.
There are two main types of sitemaps associated with Shopify:
1. XML Sitemaps
Primarily designed for search engines. It’s a structured file in XML format that helps search engine crawlers understand the hierarchy and organization of a store’s pages.

2. HTML Sitemaps
Created for human users, offering a navigational aid on the website itself. An HTML sitemap is a web page that displays the list of links to all the important pages on a site.
Both sitemaps contribute to better SEO (Search Engine Optimization) and user experience on a Shopify store. They facilitate the discovery of content by search engines and assist users in finding relevant information.
Generating a Shopify Site Map
Shopify’s platform effortlessly generates a sitemap for your online store. Simply find the file for submission to Google.
Creating a custom Shopify Site Map
If you want to customize your sitemap by excluding some URLs or eliminating spam entries, you can consider the following options:
Use Specialized Tools
Employ tools designed for creating sitemaps, allowing you to edit the results before submission.
Manual Creation
Craft a sitemap manually by entering the required data in the correct format using a text editor.
CMS Integration
Utilize a content management system (CMS) capable of generating a sitemap tailored to your specifications.
While Shopify doesn’t currently support direct sitemap editing, a workaround involves redirecting a URL from your site to an uploaded sitemap.

Follow these steps:
- Copy your Shopify-generated sitemap to a text editor.
- Modify the content as needed.
- Upload the final version following the outlined steps mentioned earlier.
This approach allows you to have a more tailored sitemap while working within Shopify’s constraints.
Where to Access Your Shopify Site Map
Locating Shopify’s automatically generated sitemaps is straightforward with a simple URL extension:
Enter your main domain and append “/sitemap.xml” to your web browser. Your Shopify sitemap URL will resemble this:
www.yourstoredomainname.com/sitemap.xml
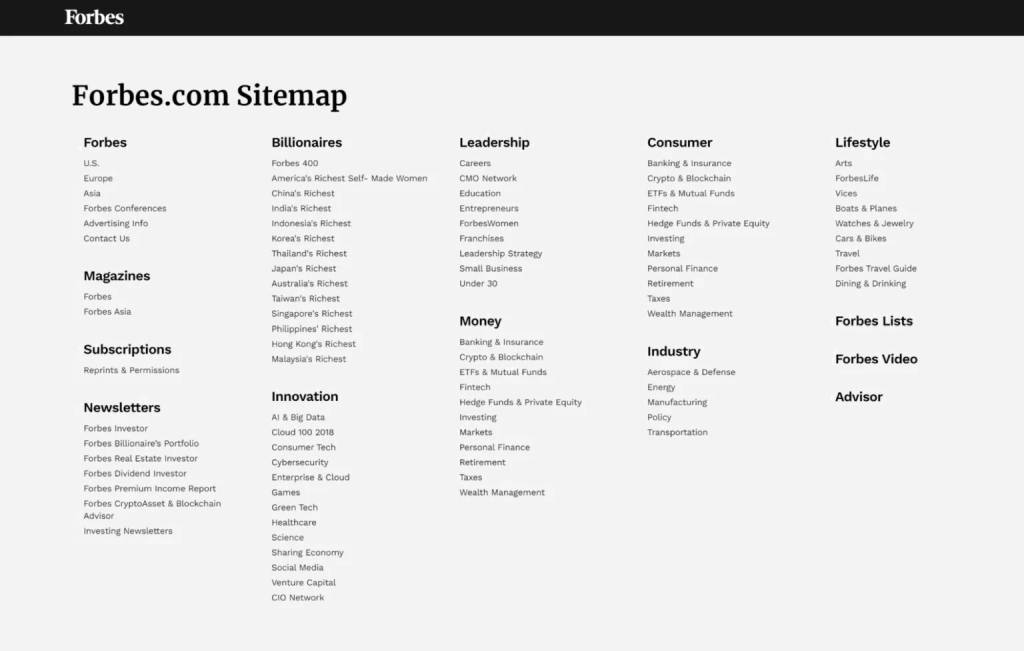
It will produce an XML page that appears similar to this:

XML sitemap document tree Shopify sitemap
You only need this URL, but for safekeeping, you can also save it as an XML file from your web browser (select “Save As XML file”).
Each URL in the sitemap overview provides more details.
For example:
- Sitemap_products_1.xml — Product pages
- Sitemap_pages_1.xml — Main pages
- Sitemap_collections_1.xml — Collection pages
- Sitemap_blogs_1.xml — Blog posts
How To Submit Your Sitemap To Google.
Submitting your Shopify sitemaps to Google is a simple process. It requires just a few easy steps.
1. Verify your site with Google
To safeguard your online store, verifying your domain with Google is crucial. Follow these steps:
Step 1: Copy Meta Tag
Utilize the meta tag verification method on platforms like Google.
Head to Google Webmasters and select the HTML tag option under Alternate methods.
When you’re on the third-party site, you’ll see the complete meta tag highlighted. Initially, you can copy this meta tag to your clipboard by pressing cmd and c on a Mac or ctrl + c on personal computers. Just make sure you’ve selected everything, including the < and >, to ensure a complete copy.
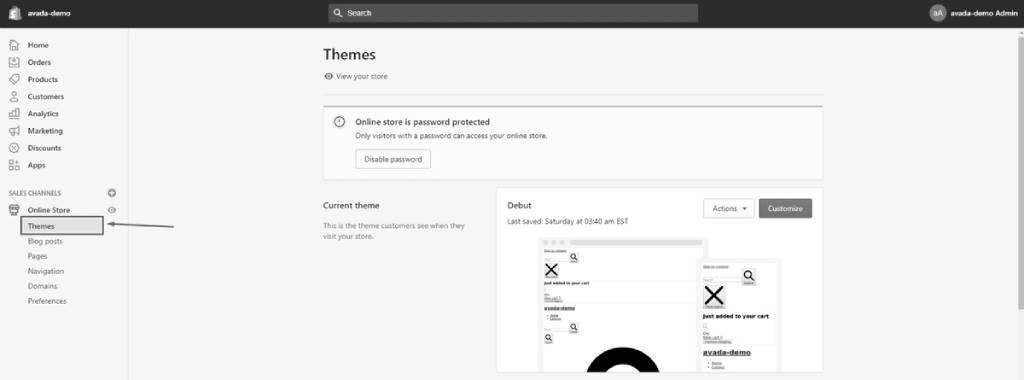
Step 2: Access Themes
Navigate to the Online Store and select Themes in your Shopify admin.
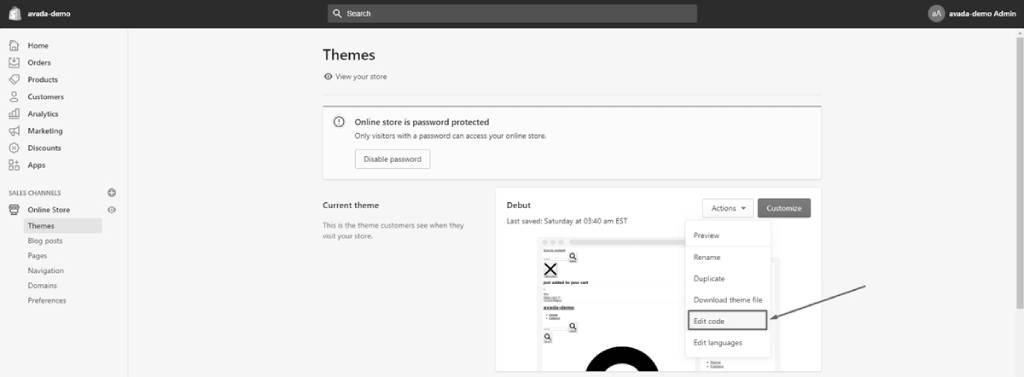
Step 3: Edit Code
Find the desired theme in the list, hit Actions, and then Edit code.
Step 4: Open theme.liquid
In the Layout section, click on theme.liquid to open the file.

Step 5: Paste Meta Tag
Paste the copied meta tag on a blank line directly within the opening <head> tag.
Step 6: Save Changes
Click Save to apply the changes.
Completing these verification steps on third-party sites like Pinterest or Google Webmasters enhances the security of your online store.
2. Access Google Search Console
Navigate to Google Search Console and choose the desired site from the upper left-hand navigation drop-down menu. Then, click on Sitemaps.
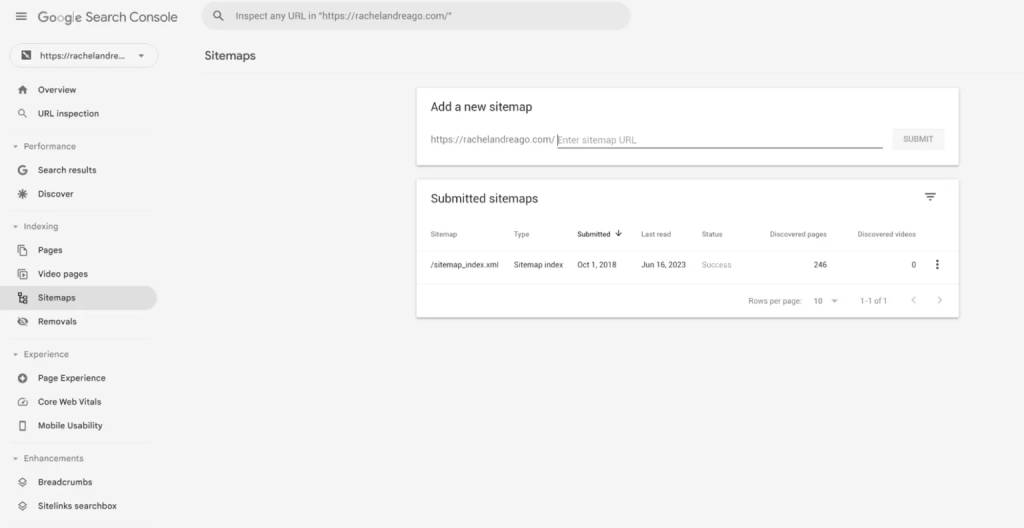
3. Paste Your Sitemap URL Extension
If you’re using Shopify’s auto-generated sitemap, add “sitemap.xml” at the end and submit it to Google. Click Submit.

4. Await Google’s Sitemap Crawl
Google may take a few days to crawl your site after submitting the Shopify sitemap, especially for larger sites. You can check its progress in the Google Search Console.
Once complete, you’ll find it live under Submitted Sitemaps:
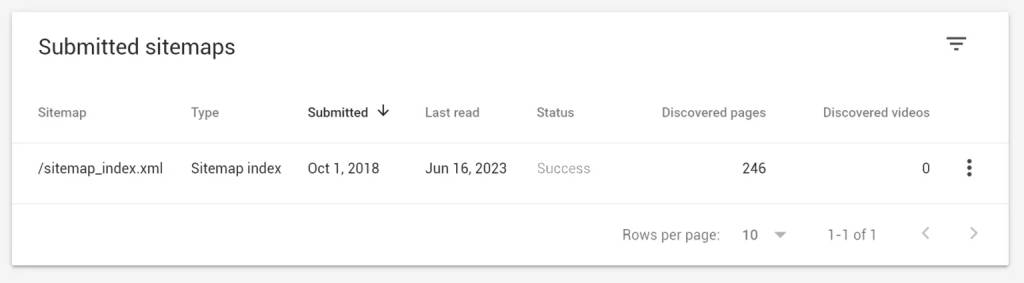
From here, you can view the number of URLs Google crawled and identify any errors that require attention.
Note: If you manage several websites, you can cross-submit sitemaps for multiple sites to Google simultaneously.


