Last Updated: July 2025
As an eCommerce business, you need to ensure that your customers are promptly responded to at any time of the day or night. Obviously, it is totally impractical to employ manpower round the clock, especially if you own a small business. We have a solution for it. Read further.
Using Freshdesk, you can send an auto-response notification for Out Of Office or after Business Hours requests when your agents are not available to attend to your customers.
Auto-response, as the name suggests, we understand that it is nothing but a predesigned set of automation rules. Which means we need to set up some automated workflows for the same. And it is not really complicated and you can easily do it in very few steps with Freshdesk.
Let’s move on to the steps.
Prerequisite for building the Freshdesk auto-response
To build your autoresponder, you’ll need the following:
- The message you want the autoresponder to send. For this, you can write a simple one-paragraph message in plain text, or create something more elaborate with all formatting written in HTML.
- Freshdesk account Admin access.
Now that you have all the basic requirements ready, let us now move on to setting up the workflows. To meet this requirement, firstly, you need to set up a new automation rule.
Execute All Matching Rules
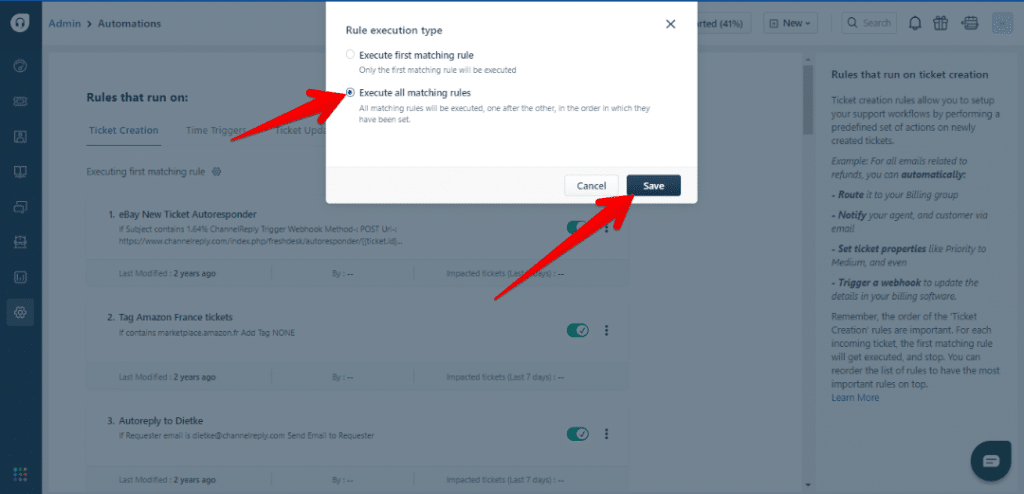
By default, Freshdesk automation uses the “Execute first matching rule” setting. This setting ensures only the top automation in your list triggers per ticket, maintaining priority. This will fail your autoresponder execution. So we recommend you switch to “Execute all matching rules“.
To do this in Freshdesk,
- Go to Admin and click on the gear icon on the left.
![]()
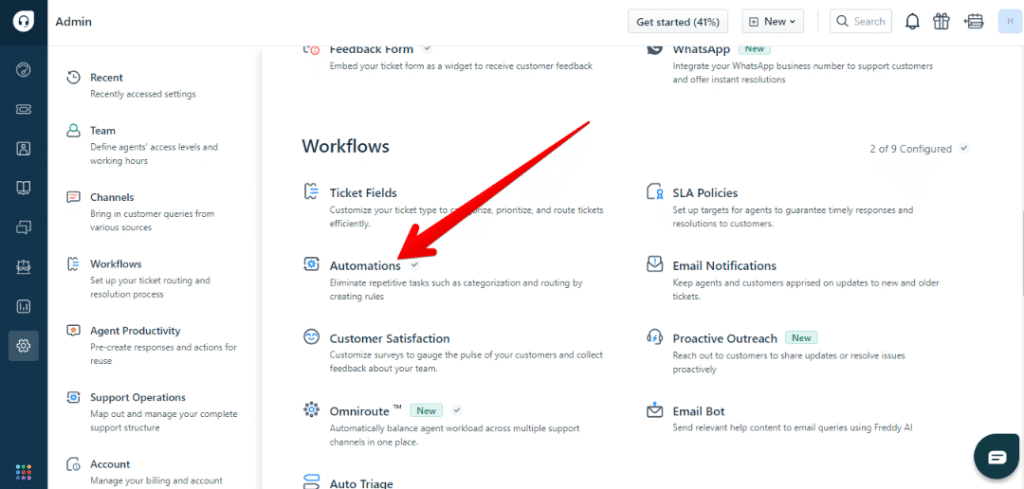
- Scroll down to “Workflows” and choose “Automations“.
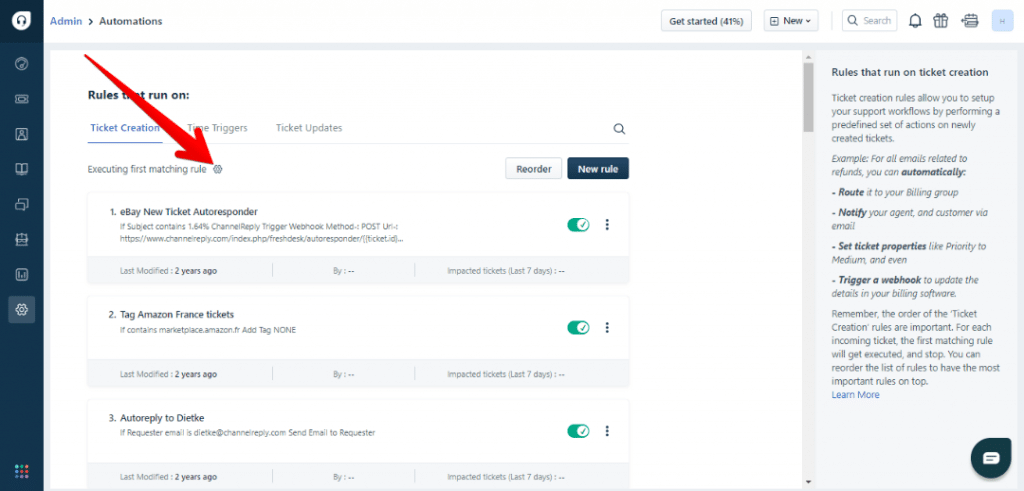
- Look for “Executing first matching rule” near the top of the page. If you see this setting, click gear icon on its right.
- Switch to “Execute all matching rules” and then click “Save“.
Next comes the steps to create a new rule,
- Go to Admin
- Select Workflows
- Click on Automations
- Then select Ticket creation
- Now choose New rule.
We can understand this better with an example.
Sample rule:
Consider this: Auto-replying to customer ticket requests during off-hours ensures timely acknowledgment and support.
In the New rule box, select conditions and actions from the boxes and dropdown menu to complete the setup. The steps for the same are as follows,
Conditions:
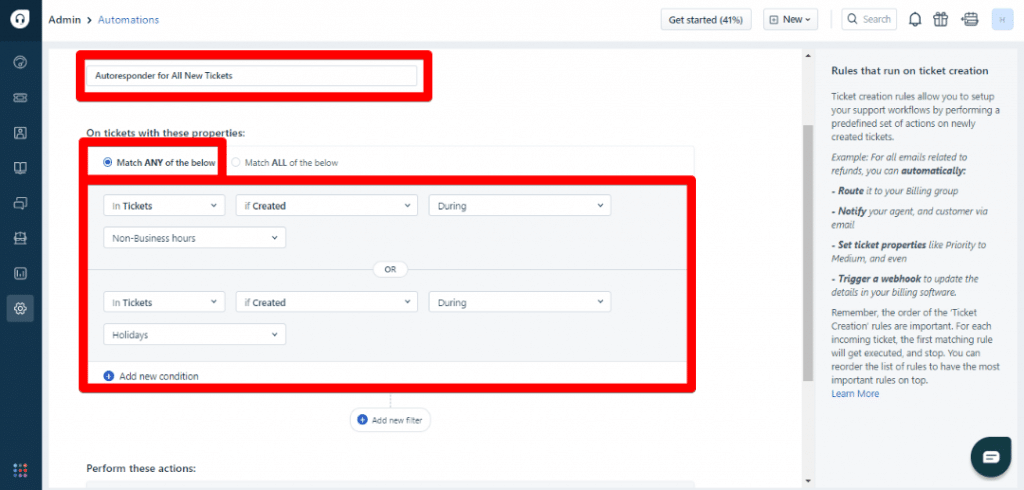
- Under the tickets, choose ‘If Created’ from the menu.
- Select ‘During’ in the next text box
- Now select ‘Non-Business Hours,’ specify the hours.
However, if you are an expert Freshdesk user and are familiar with using tag-based conditions, then you can set it to “Match ANY of the below” condition and set it to two timings – for example, select ‘Non-Business Hours’ in one of the ‘During’ boxes and ‘Holidays’ in another ‘During’ box.
Actions:
In the ‘Perform these actions’ box that is down below, select ‘Send Email to requester’ from the menu (you can also customize the subject and body of the message).
Now, let us look into another type of Freshdesk auto response which is automatic email response.
Freshdesk auto reply for emails
Freshdesk has a default email notification that would be sent to your customers when they create a ticket. It also allows you to edit the message or subject of the notification and save it to send a custom notification to them. This is easily editable within Admin using the following steps.
To configure the Freshdesk automatic email response to customers when a ticket is created,
- Go to Admin and select Workflows.
- Choose Email Notifications and select New Ticket Created.
- Edit the message or the subject and click on Save.
Another flexibility with Freshdesk is that you have complete control over the type of tickets you want the autoresponder to answer. It can respond to any of the following:
- A single Walmart, Newegg, Back Market, Shopify, eBay, or Amazon account.
- Any number or combination of those accounts.
- Every single message that comes into Freshdesk.
- Once you’ve decided how you want the autoresponder to work, give it a name.
Additional Autoresponders using Freshdesk
The auto-responses rules which you have set so far are for only first-time responses to your customers’ tickets. These do not apply when your customers respond back using the same thread as Ticket Updates.
There is an option for you to set this ticket update autoresponder which will trigger every time a customer sends a reply to an existing ticket. And this can be done as follows,
Steps to set Ticket update auto-response
Just like before, go to Admin, and click on the gear icon on the left.
Next, scroll down to “Workflows” and choose “Automations“.
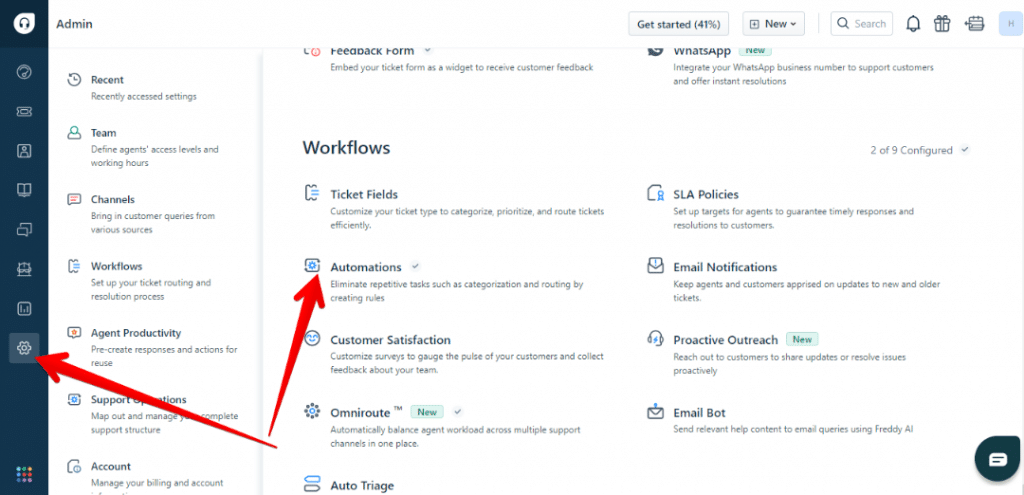
Click “Ticket Updates” and then “New Rule”.
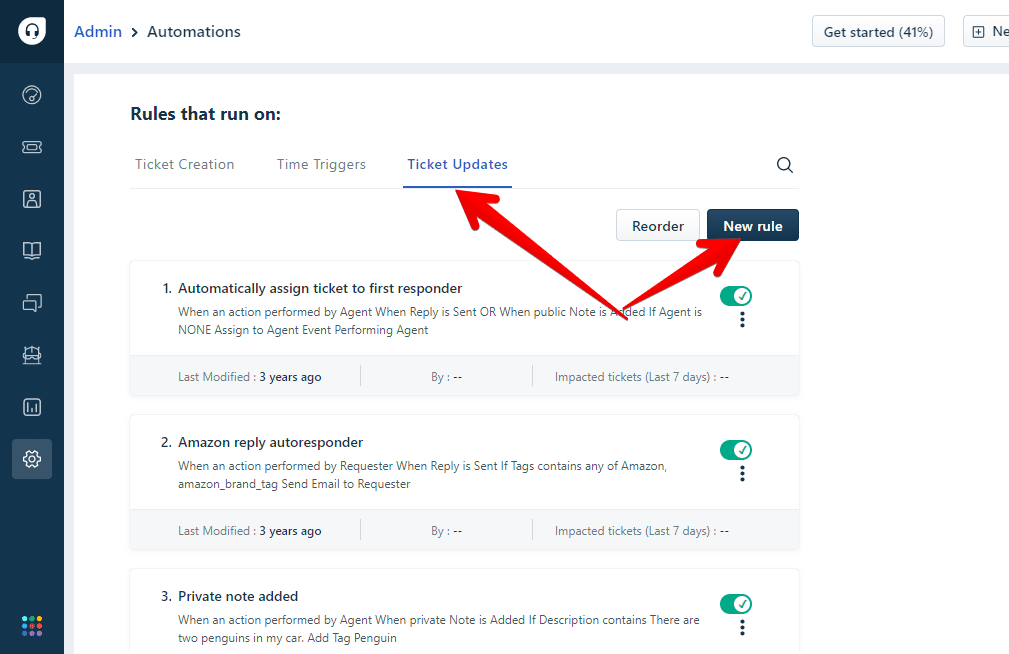
Give your autoresponder a name. Then, add conditions that will decide when the rule will go off.
Now start with these settings:
Select ‘Requester’ under the ‘When an action is performed by…’ options.
Choose ‘Reply is sent’ from the drop-down menu for ‘Involves any of these events:’.
If you ever need to create more autoresponder rules customized to different channels or conditions,
- Next to your New Rule, you will find the column of three dots, click on that.
- Then choose “Clone”.
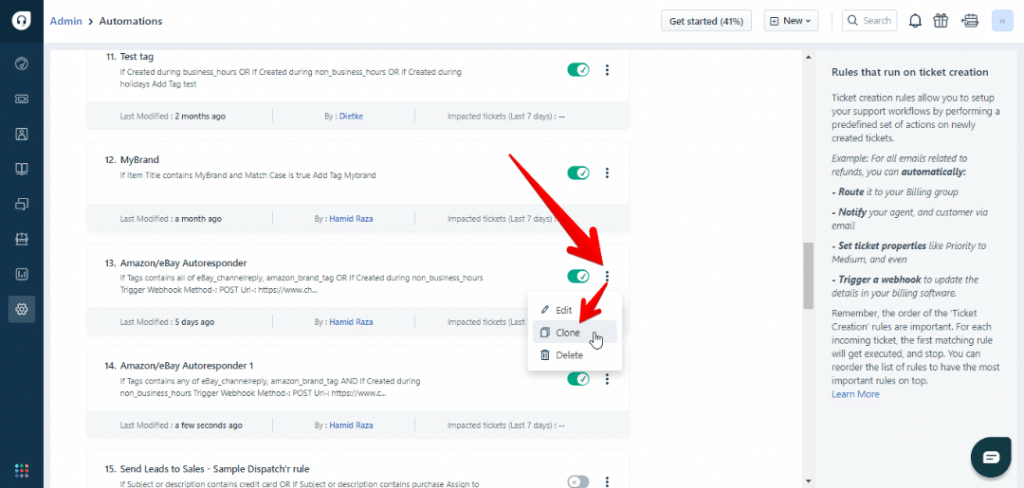
- Give the clone a new name.
- Change the conditions as desired.
- Update the message in the Content field as required. And you are done.
Final Words
So, those were the steps to set Freshdesk auto response rules for different types of tickets and your customers’ request responses. We are sure that this article will guide you through this setup thoroughly.
However, if you are looking for a simpler tool that can easily integrate and launch auto-responses with just a click, check out Saufter. We recommend you make use of the trial period to know its full features for your customer support services.
